
In which I finally start delivering on the promised painting guides...
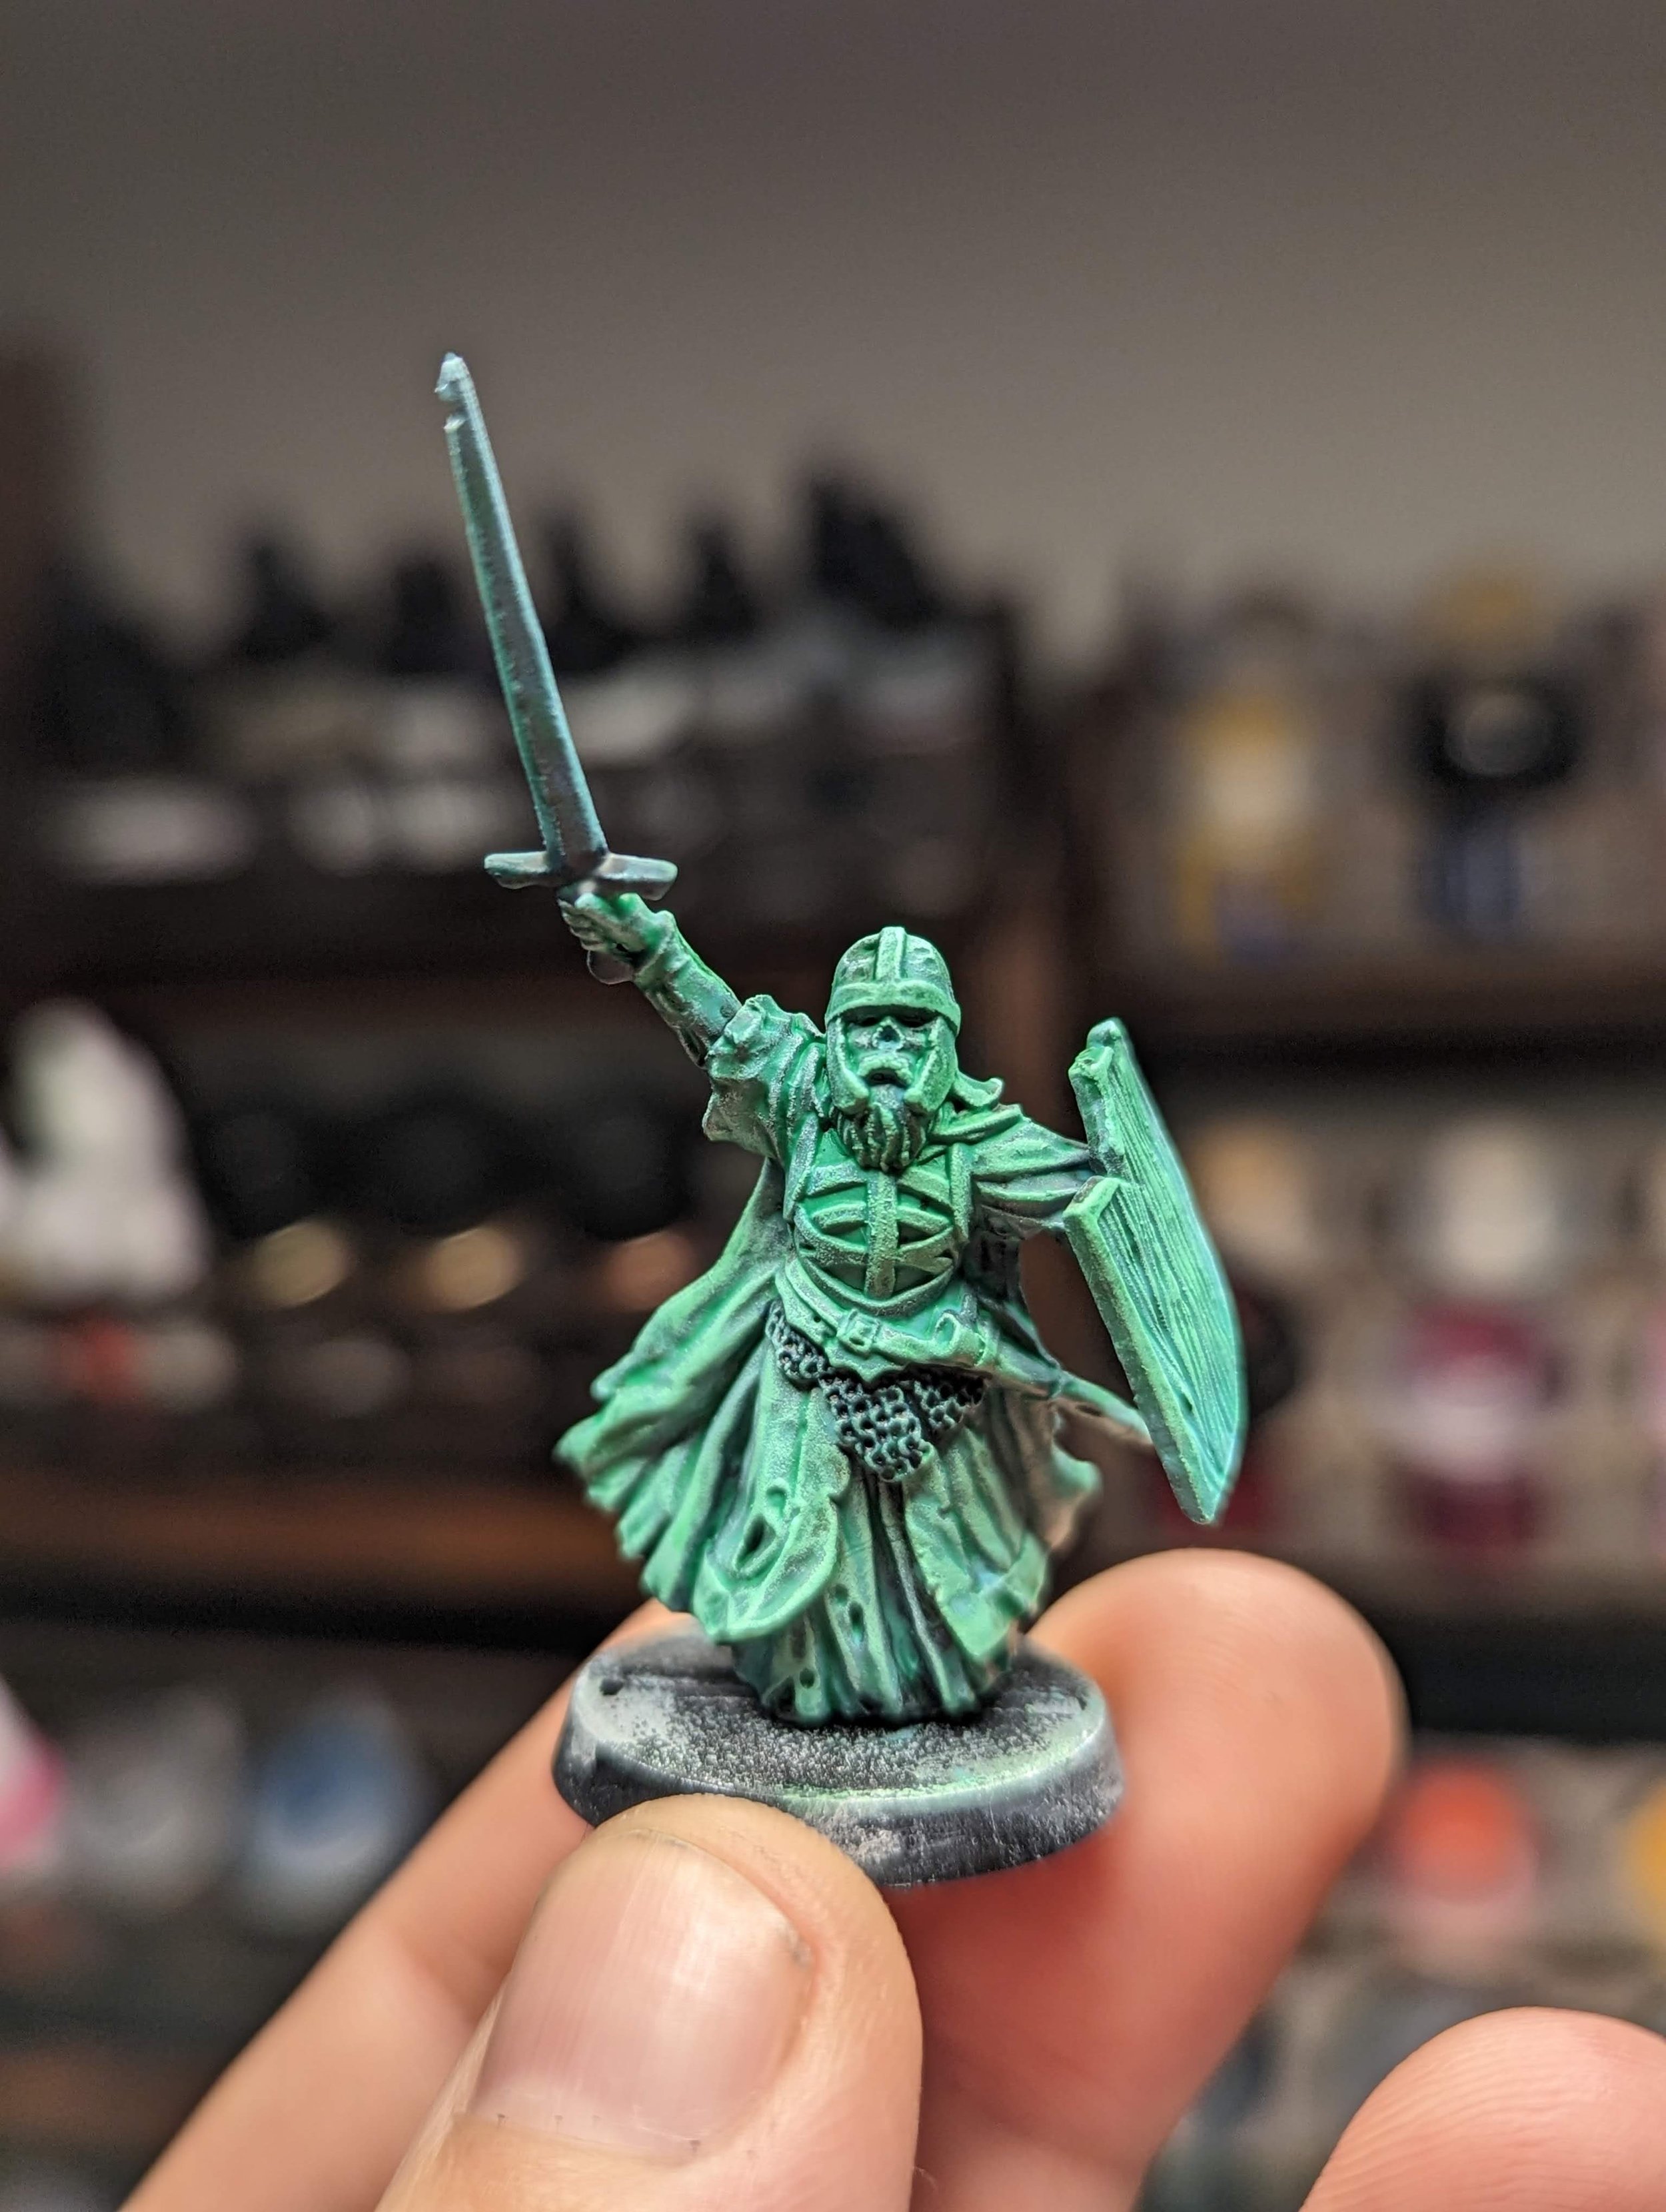
I have been sat on a fully constructed Battle of Pelennor Fields box for just about a year after purchasing it as a Christmas present to myself at the tail end of 2021. Having signed up to a few "slay the grey" style challenges in the New Year I thought it was time to start with a nice easy paint job.
N.B: I'm using undiluted paint unless specified. With lots of drybrushing in this guide we aren't watering things down. The colours are Citadel Colours unless specified.
Setting yourself up for success
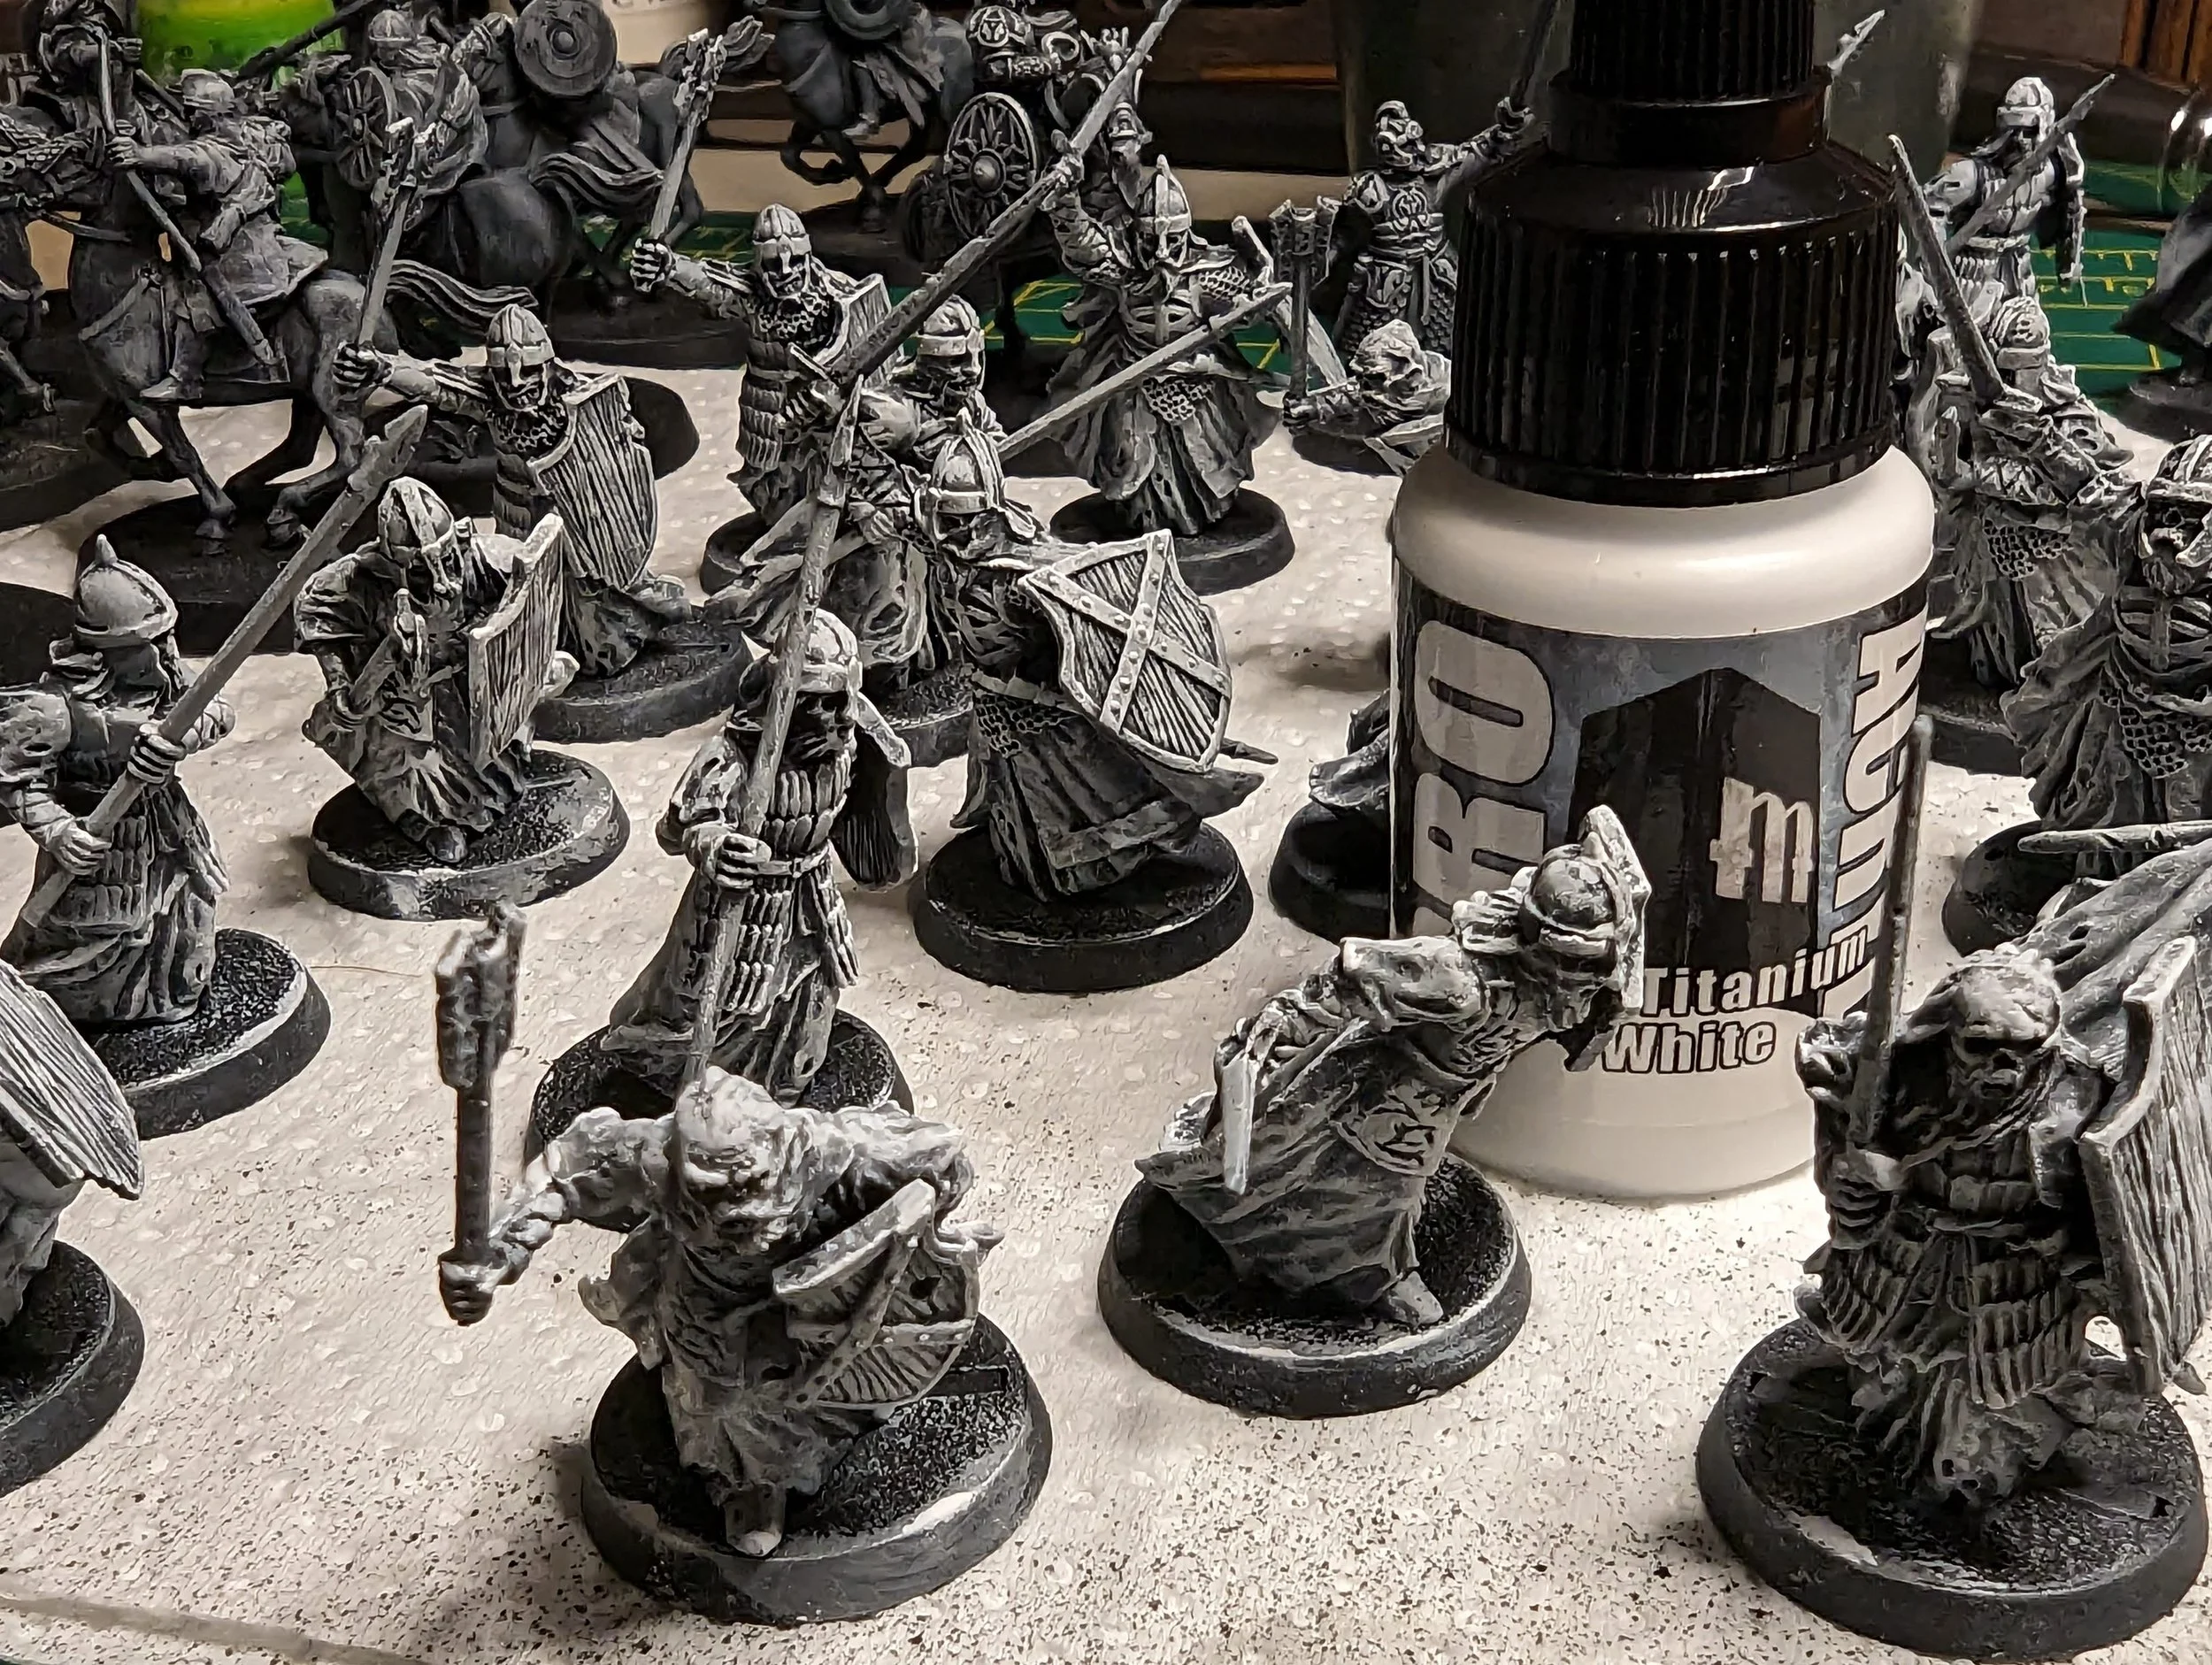
Most of the painting guides I've seen (inspirations are linked at the bottom) use contrast paints or washes over a white or grey basecoat. Having been enjoying all the various slap chop variants since I got back into the hobby I wanted a method that keeps the brightness of some of my inspirations while also boosting the overall contrast. So here's my undercoat recipe
Black undercoat (I used Army Painter Matt Black).
Heavy zenithal drybrush* of Mechanicus Standard Grey.
Lighter zenithal drybrush of Administratum Grey.
A lighter still drybrush of Corax White.
Final highlight of Pro Acryl Bold Titanium White.
This should leave you with some nice shadows and strong highlights over which to apply your washes and contrast paints:
Zenithal undercoat with extra steps
I also tried to glaze some old Boltgun Metal on the armour and weapons but I think this stage is unnecessary, you'll see an easier solution for making the metals stand out below....
*I used Artis Opus drybushes if you are interested...
How To
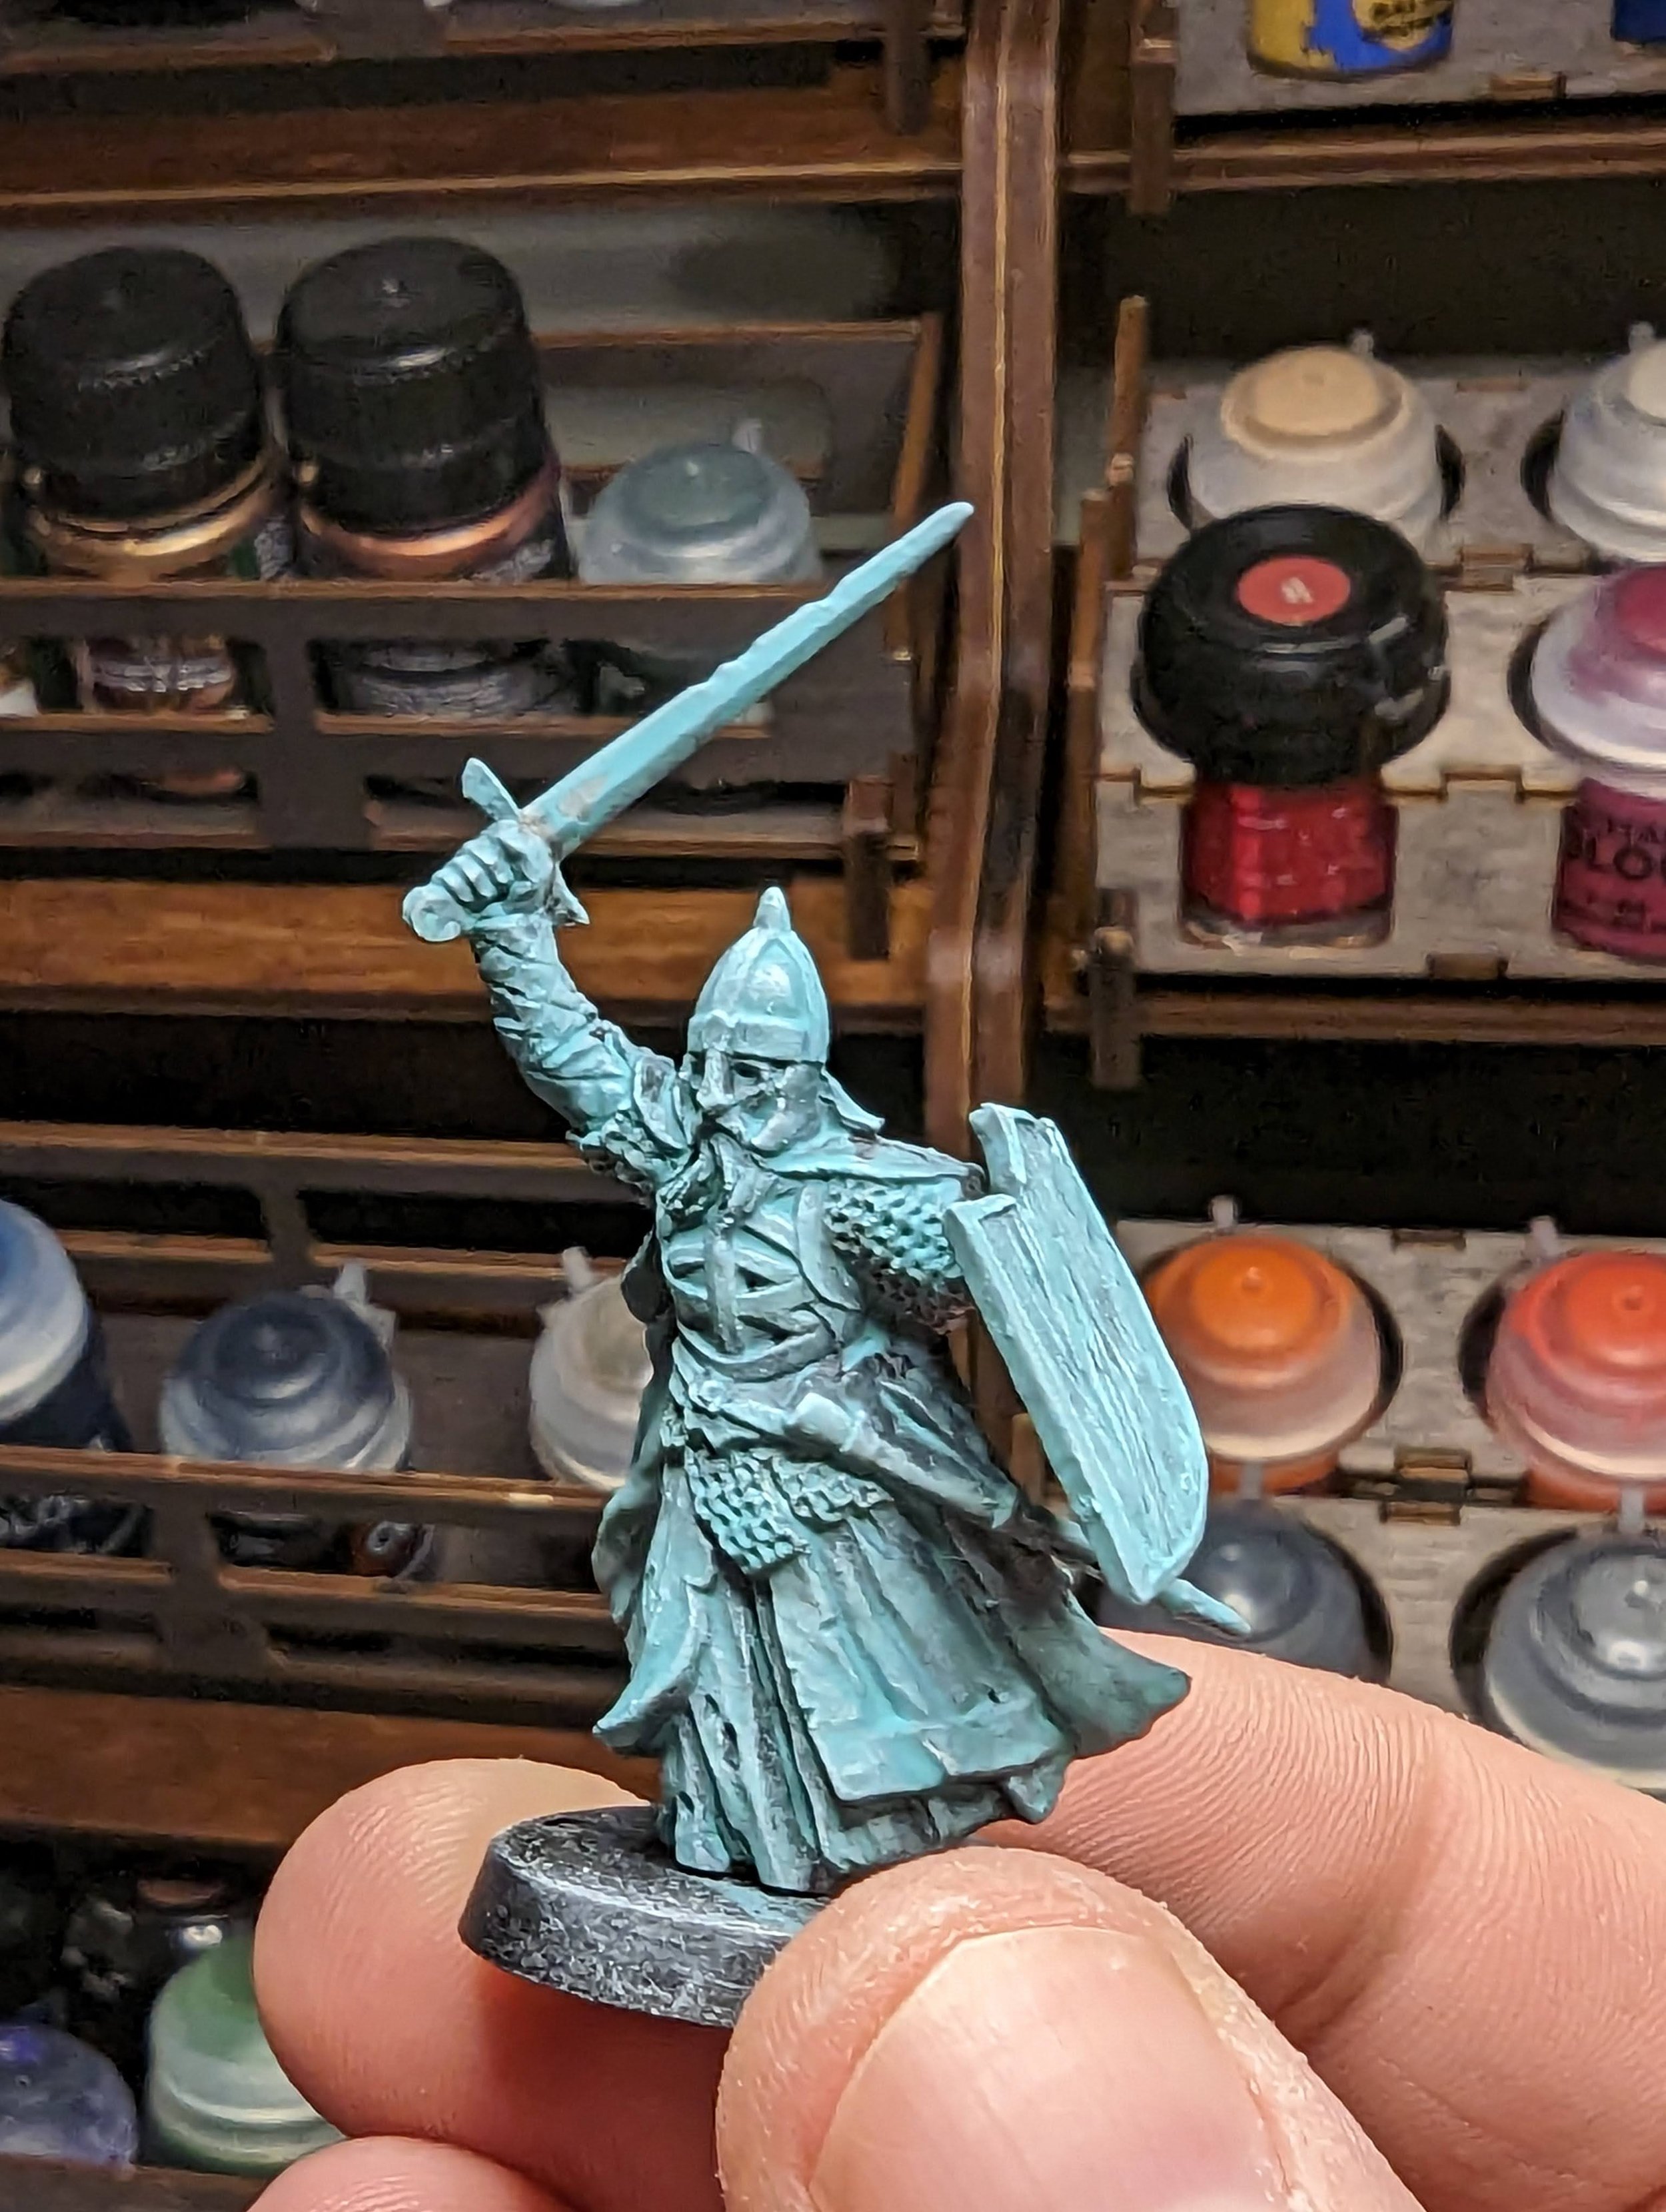
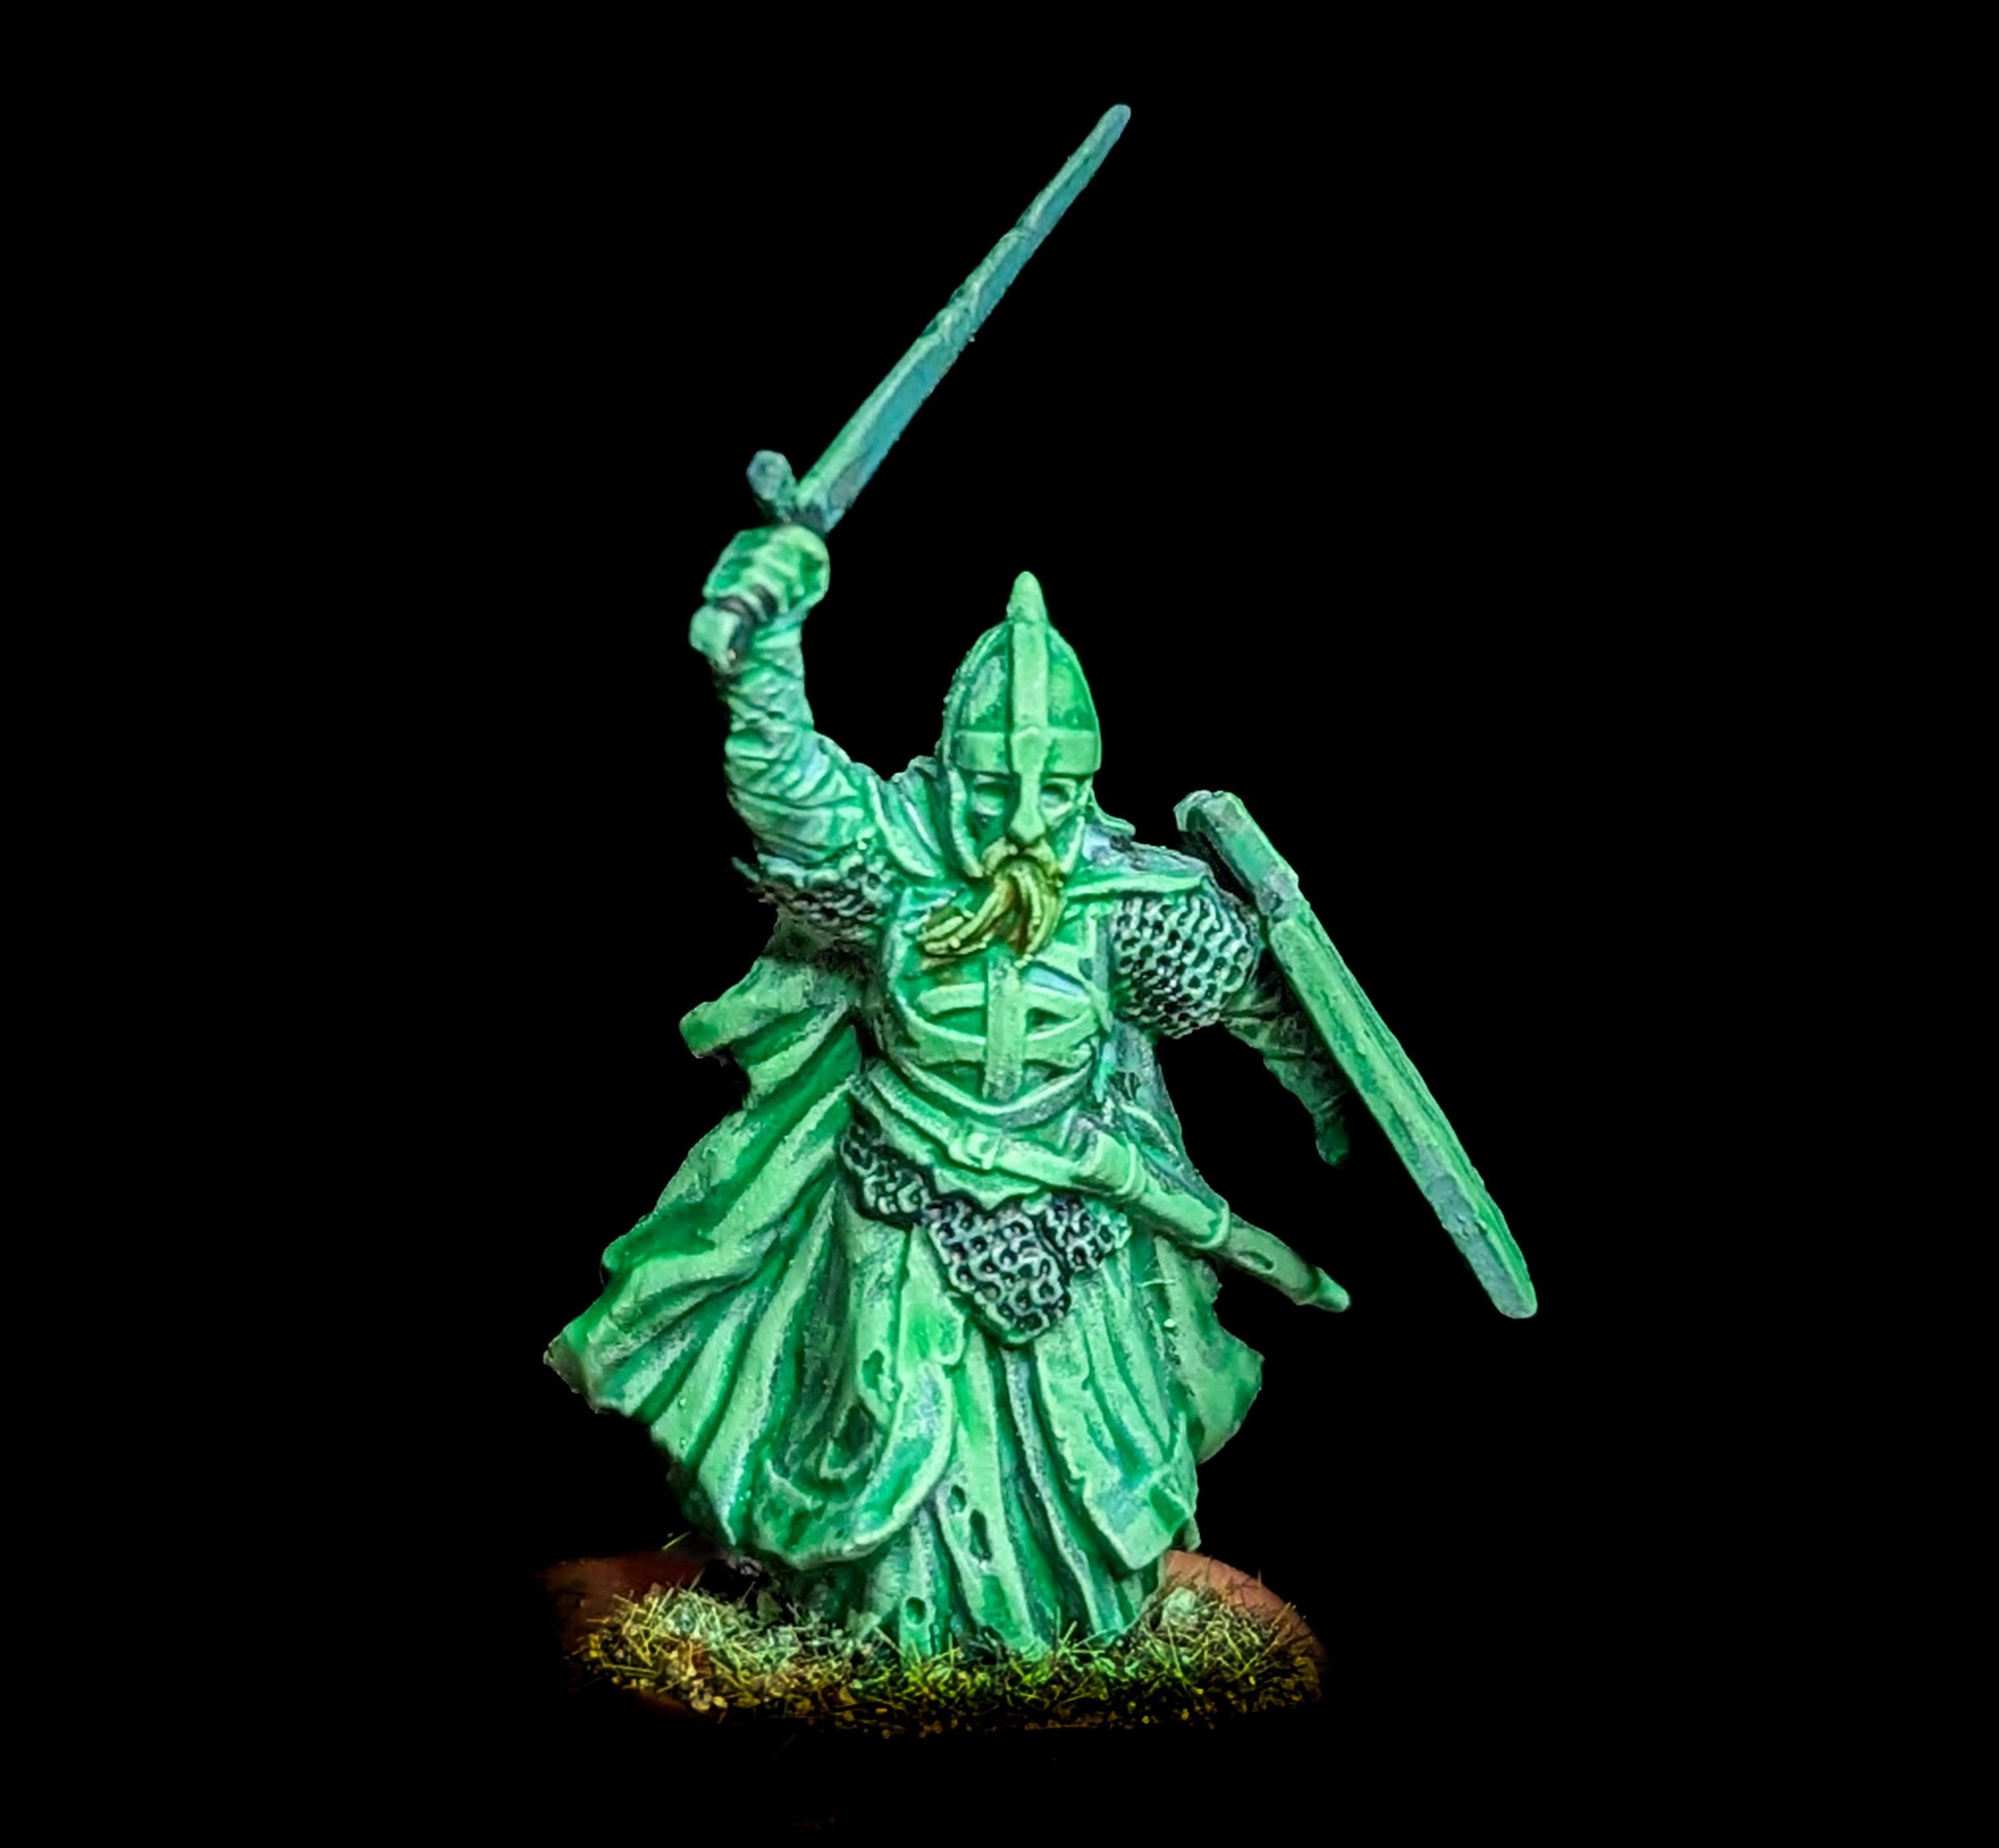
Wash the entire mini with Nihilakh Oxide. This will give some of the base colour but also give some interesting texture across the mini.
Mix 4 parts Ulthuan Grey to 1 part Warpstone Glow on your palette and do a medium strength zenithal drybush over the mini. At this stage you have a pretty decent statue effect that could be used for scenery.
Wash any weapons and armour with Drakenhof Nightshade.
Wash the hair and beards with either Seraphim Sepia or Cassandora Yellow (mix it up to give some variety to the minis).
Use a 50:50 mix of Contrast Medium and Hexwraith Flame all over the mini.†
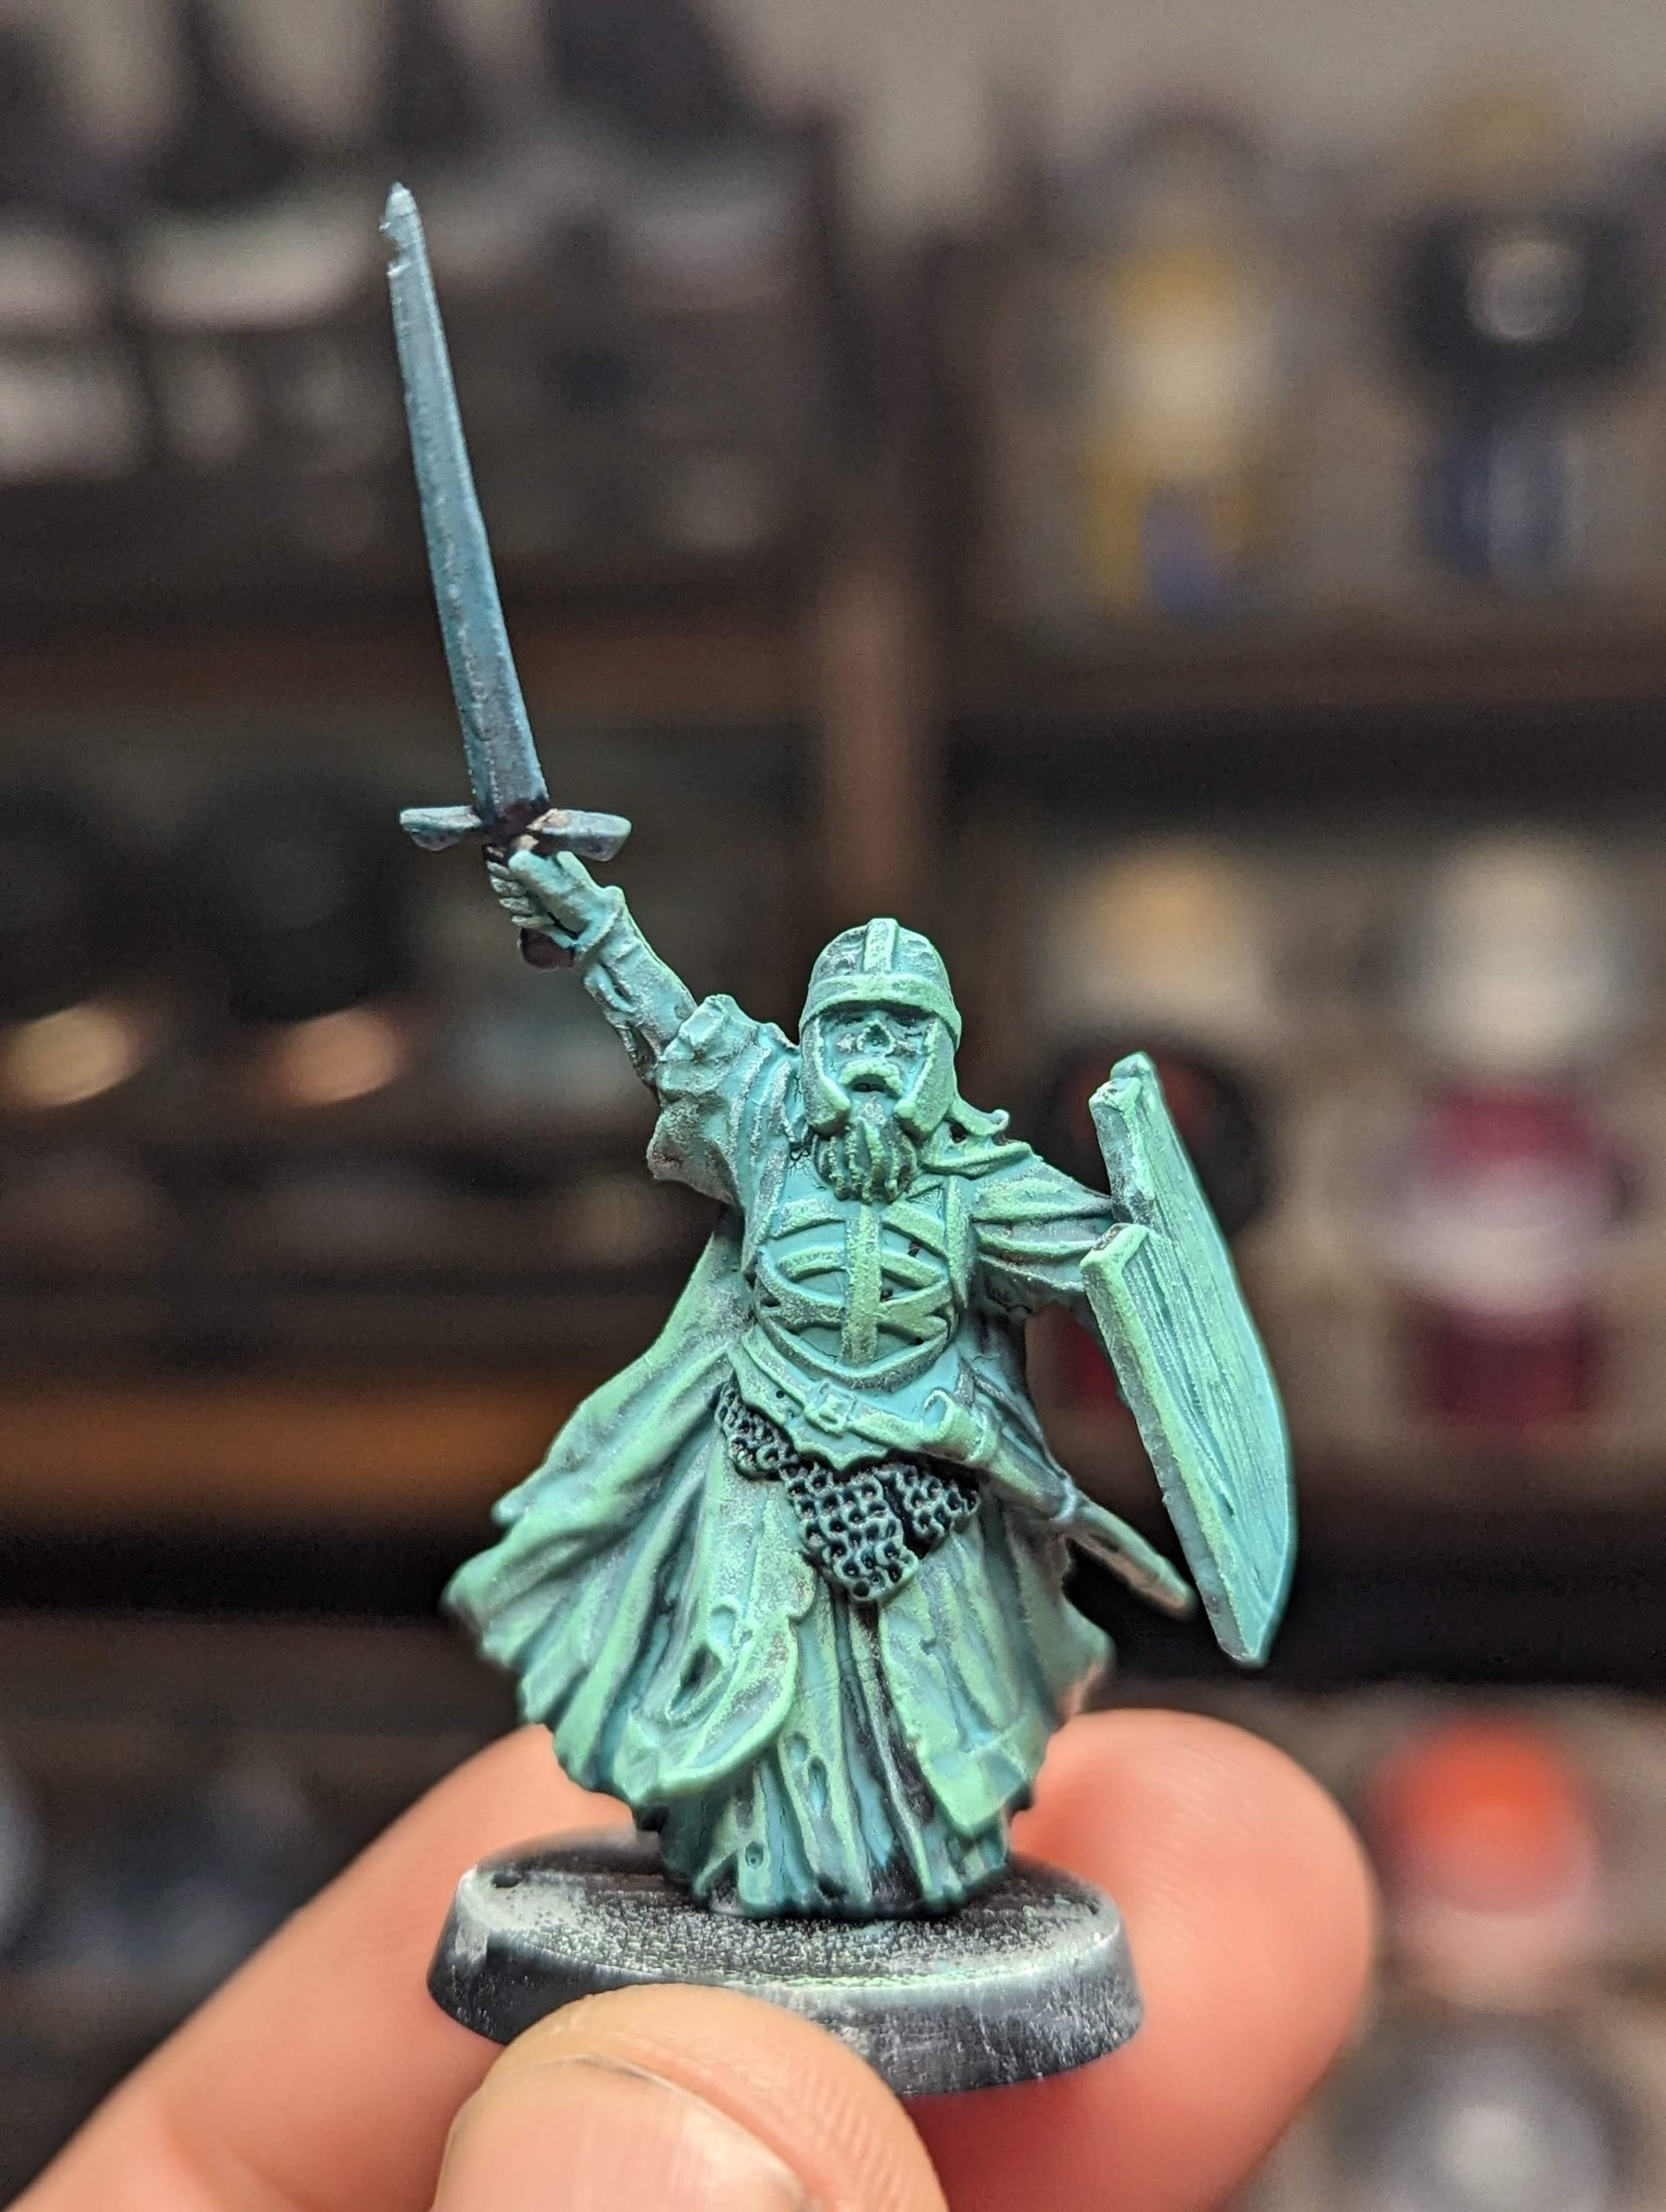
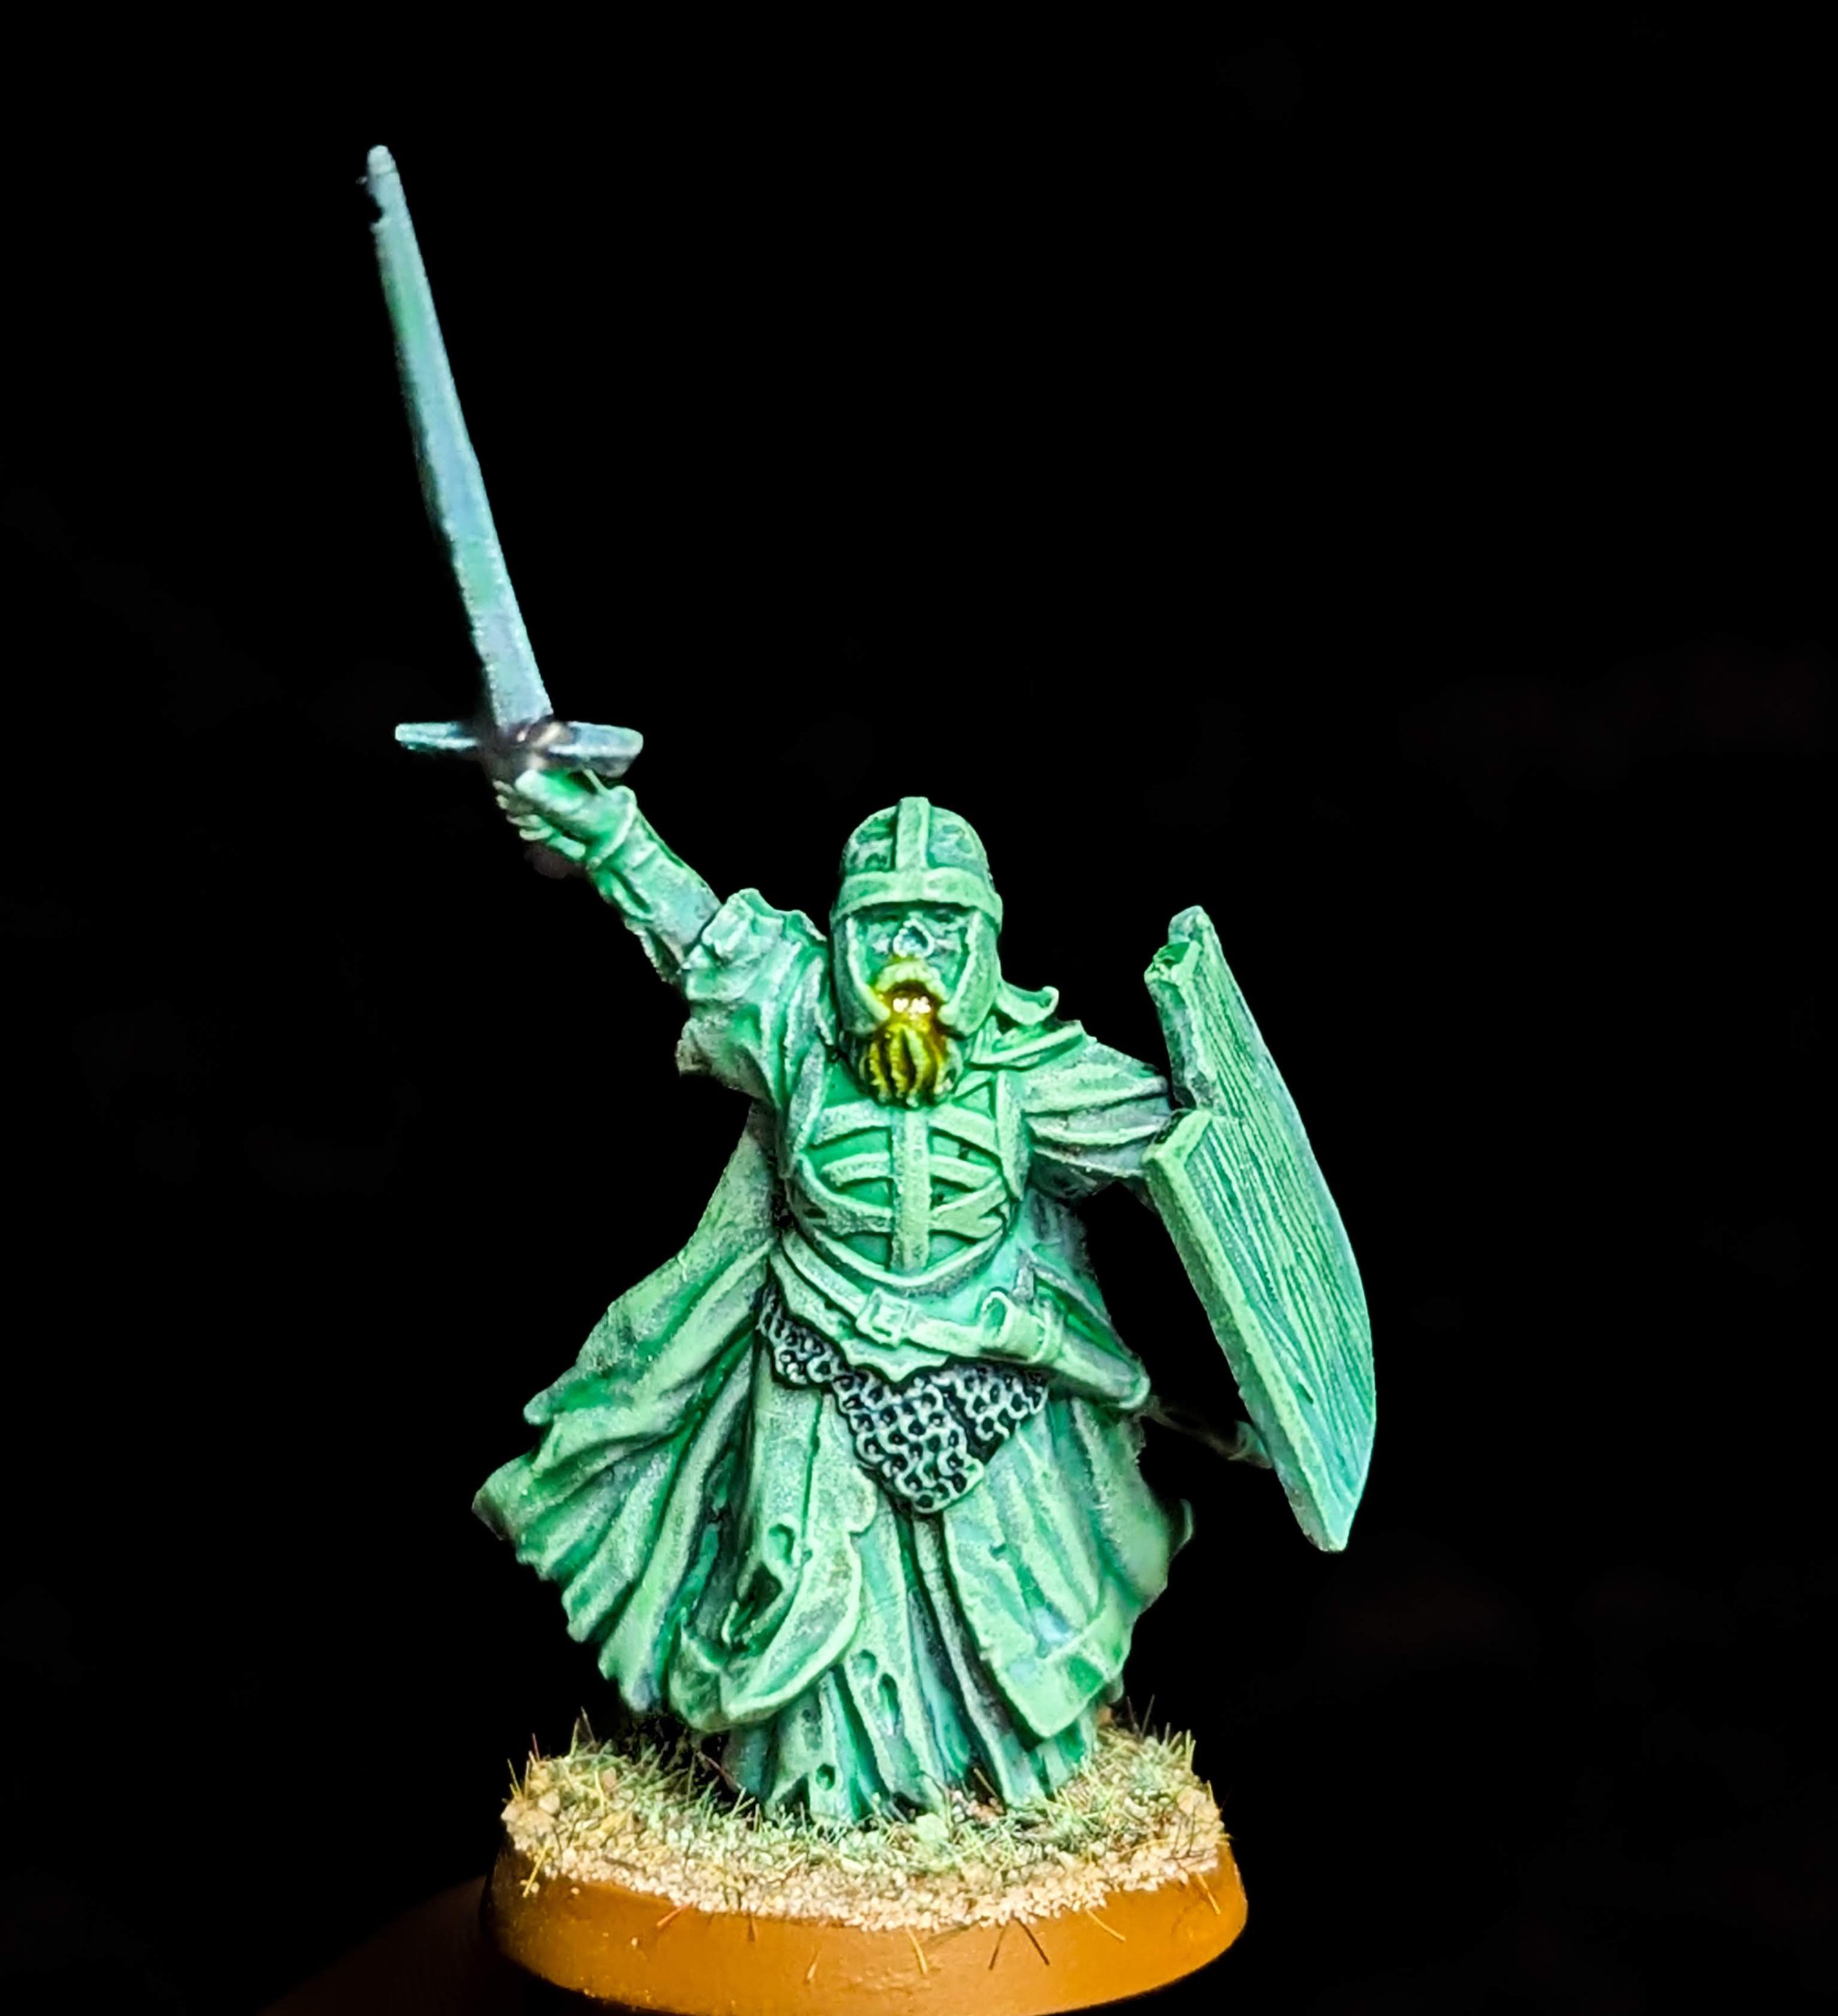
Once everything has dried use your favoured basing materials (I used Base Ready Fields of New Zealand) and paint the base rim (I used some old Bestial Brown to match my existing MESBG forces).
Once everything is dry come back with a small drybrush and a 4:1 mix of Pro Acryl Bold Titanium White to Hexwraith Flame and try to catch the tufts and basing material as if the light has been cast from the miniature.
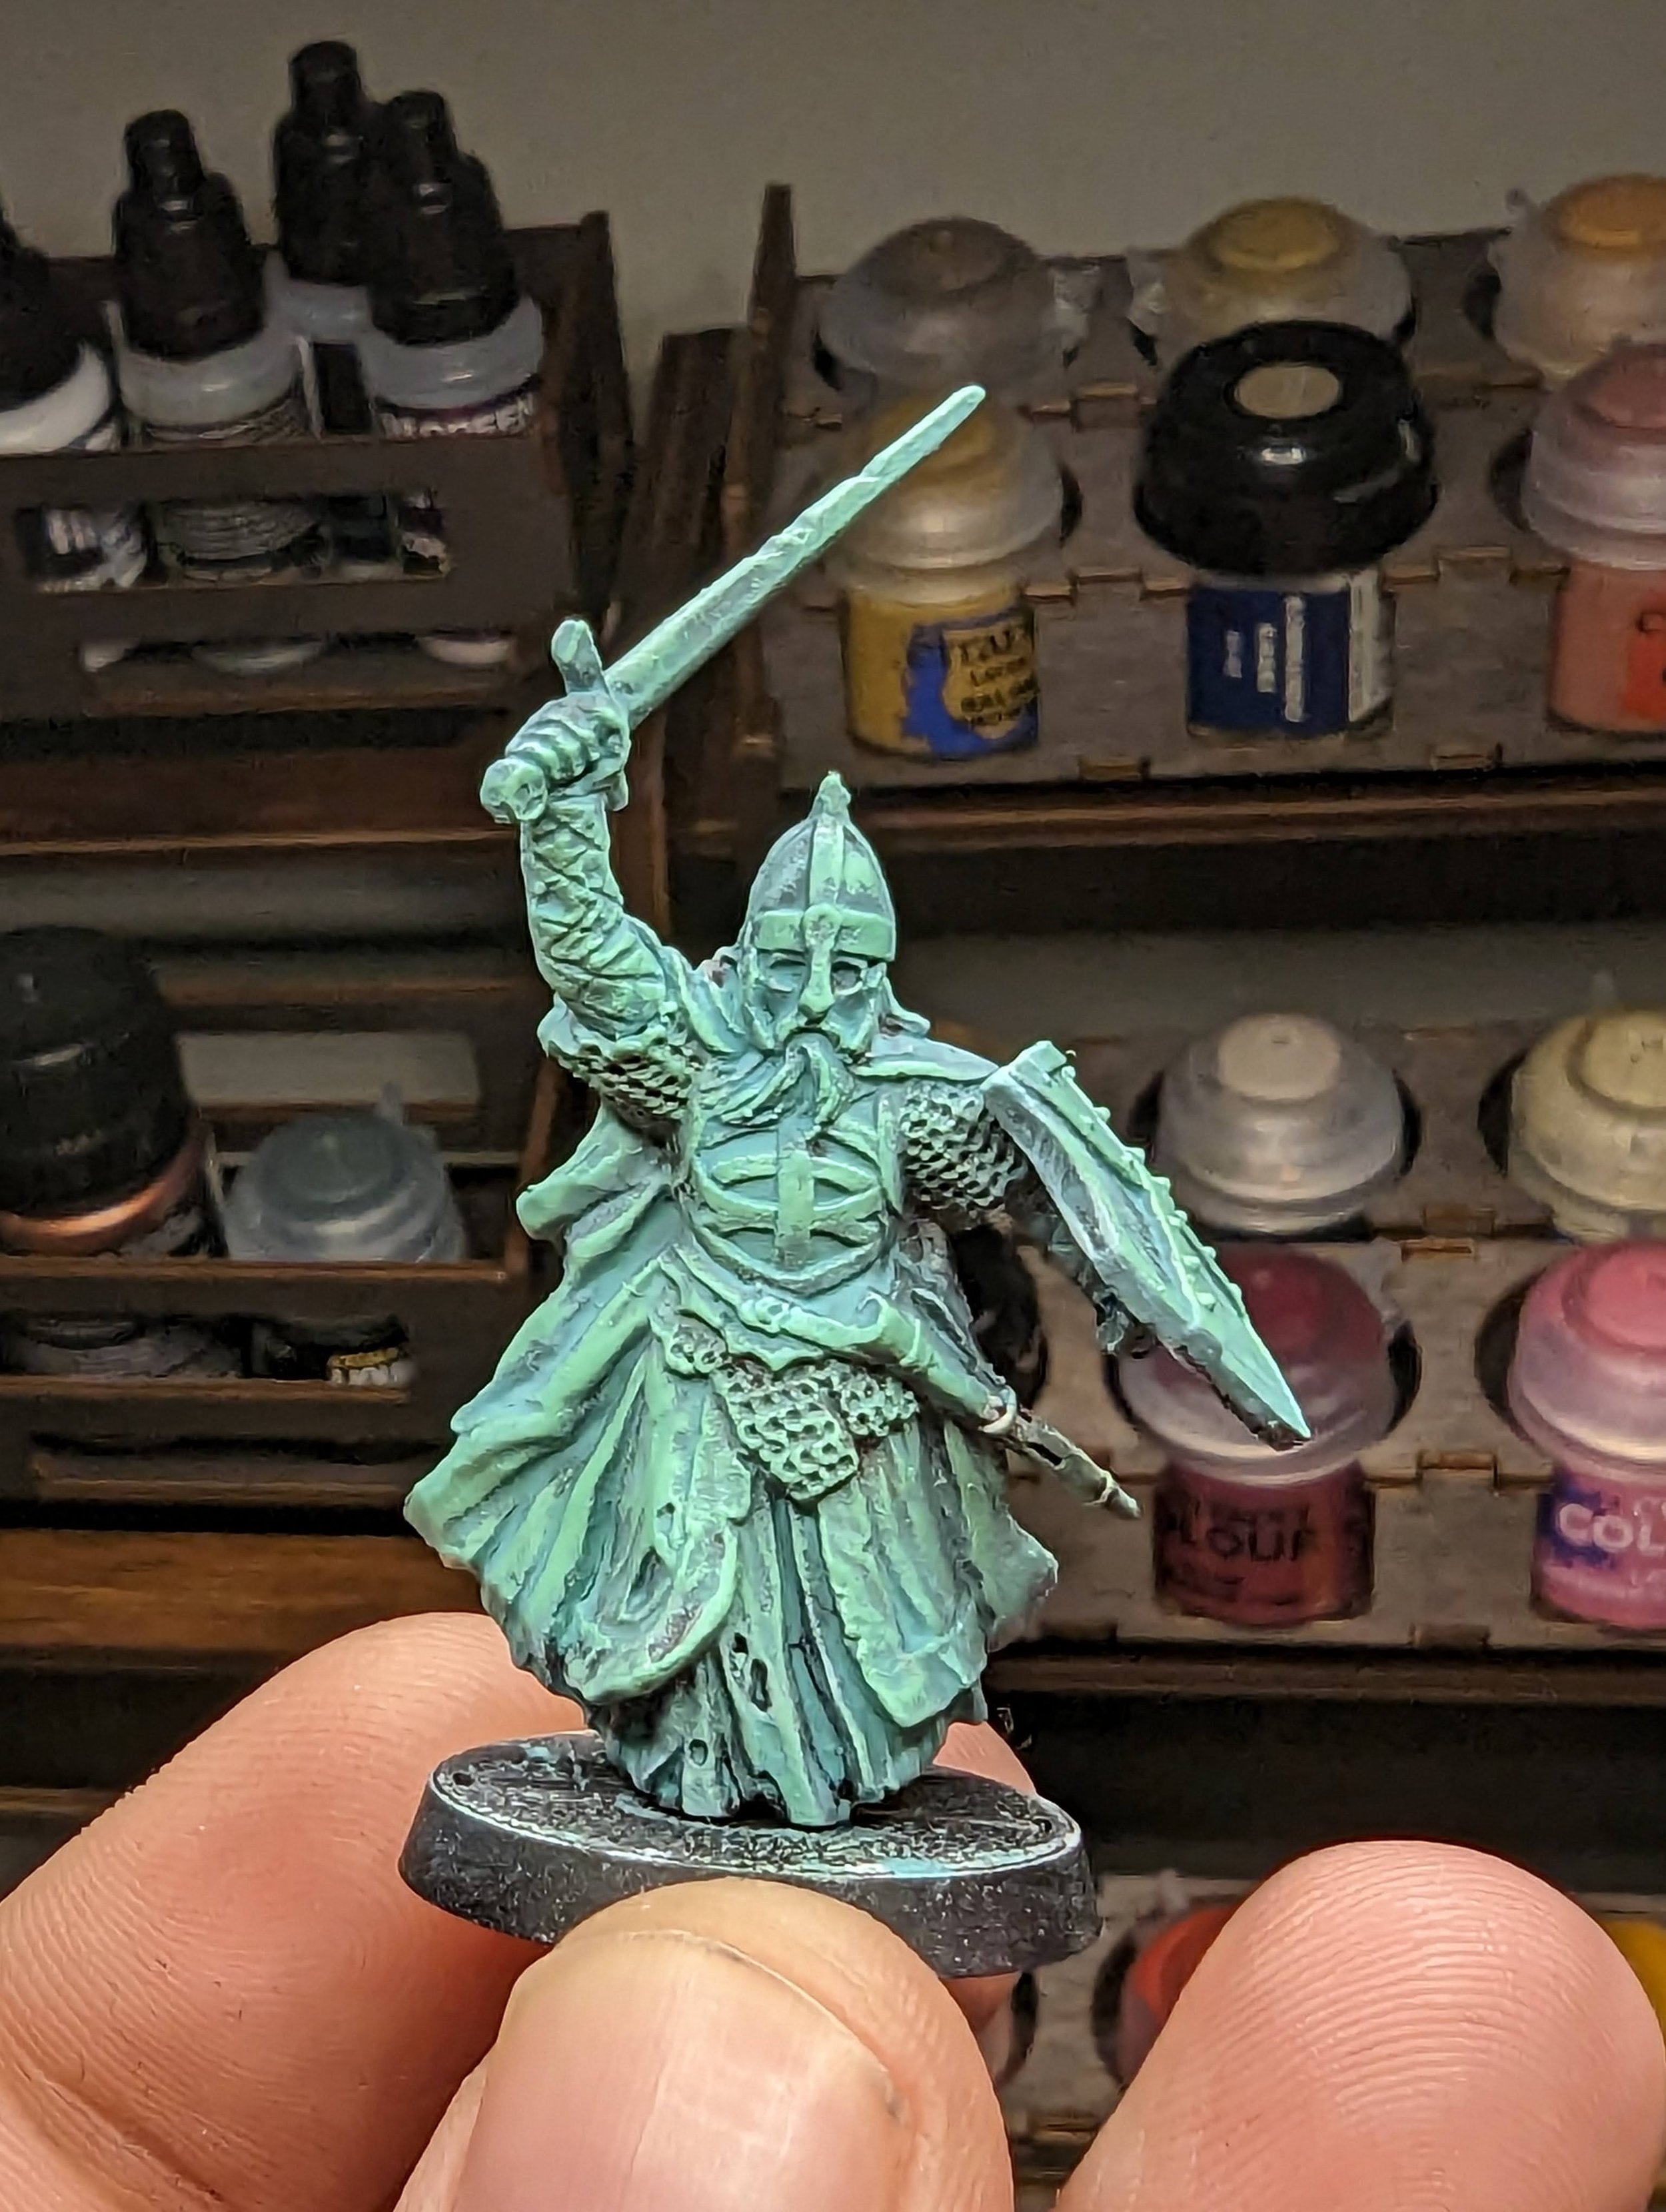
†Tweak this mix slightly to boost or reduce the green glow effect. I did 10 of my minis with a 50:50 mix and 10 with about a 70:30 mix of Hexwraith to Contrast Medium.
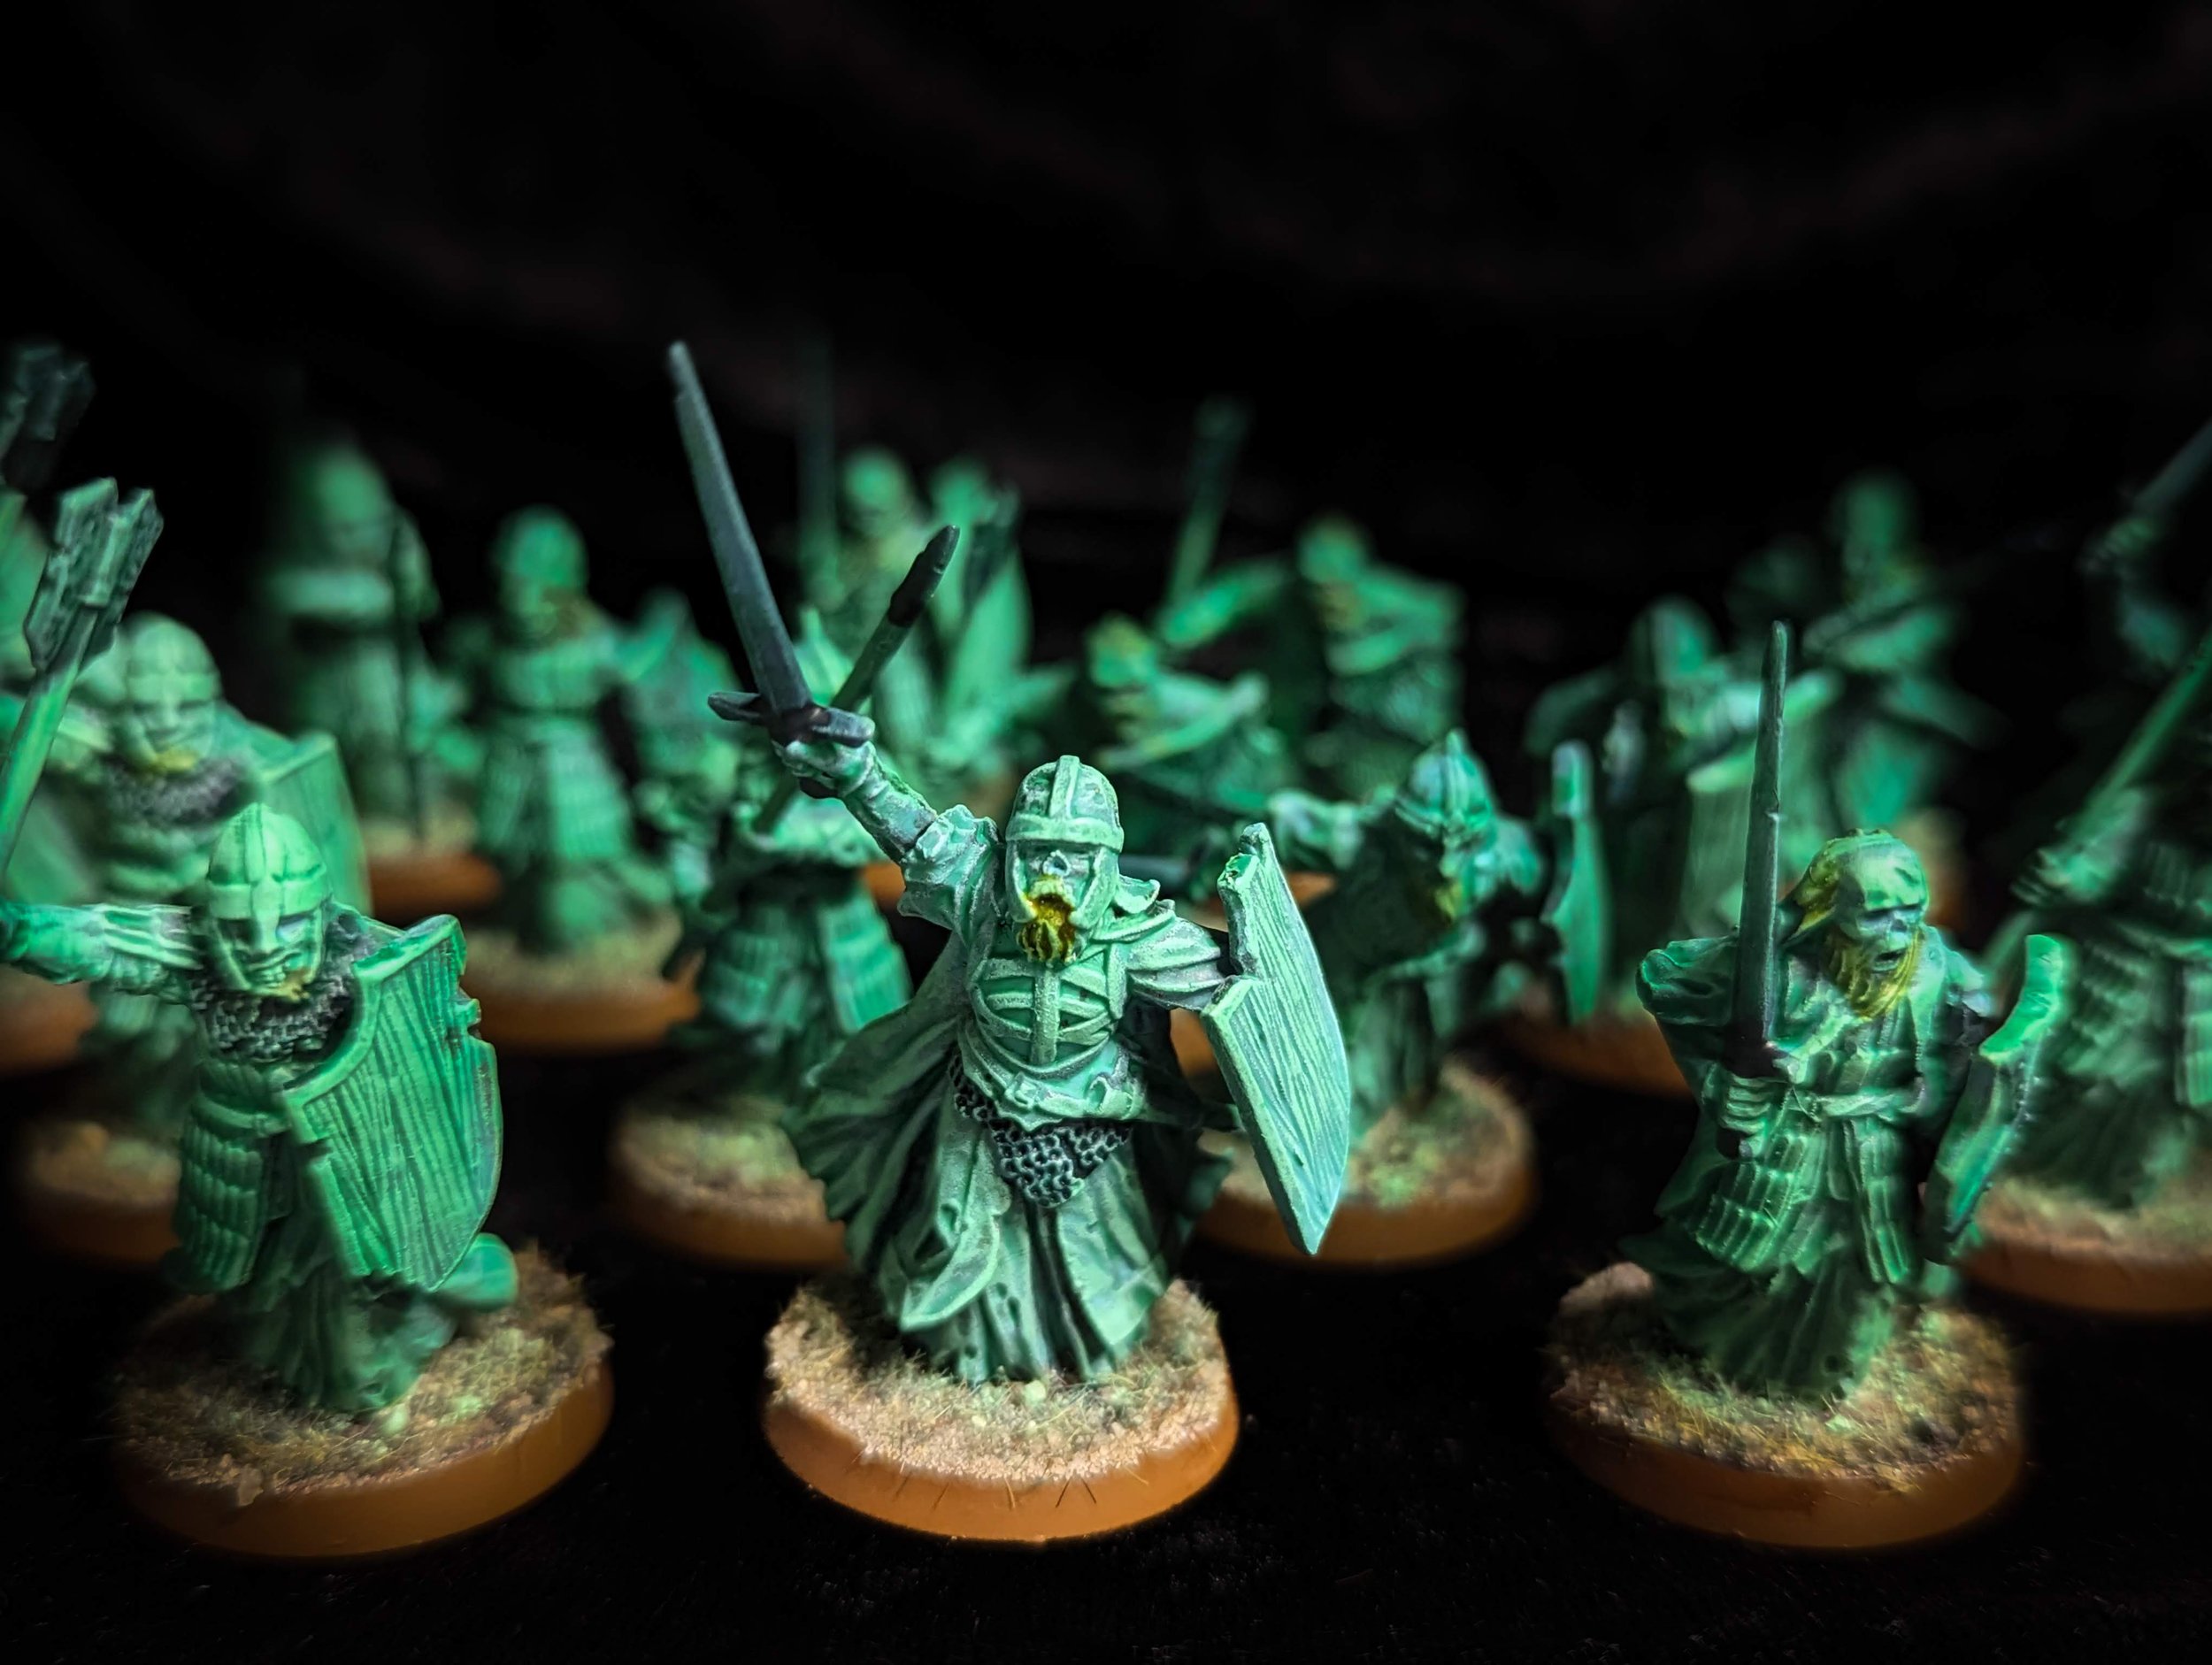
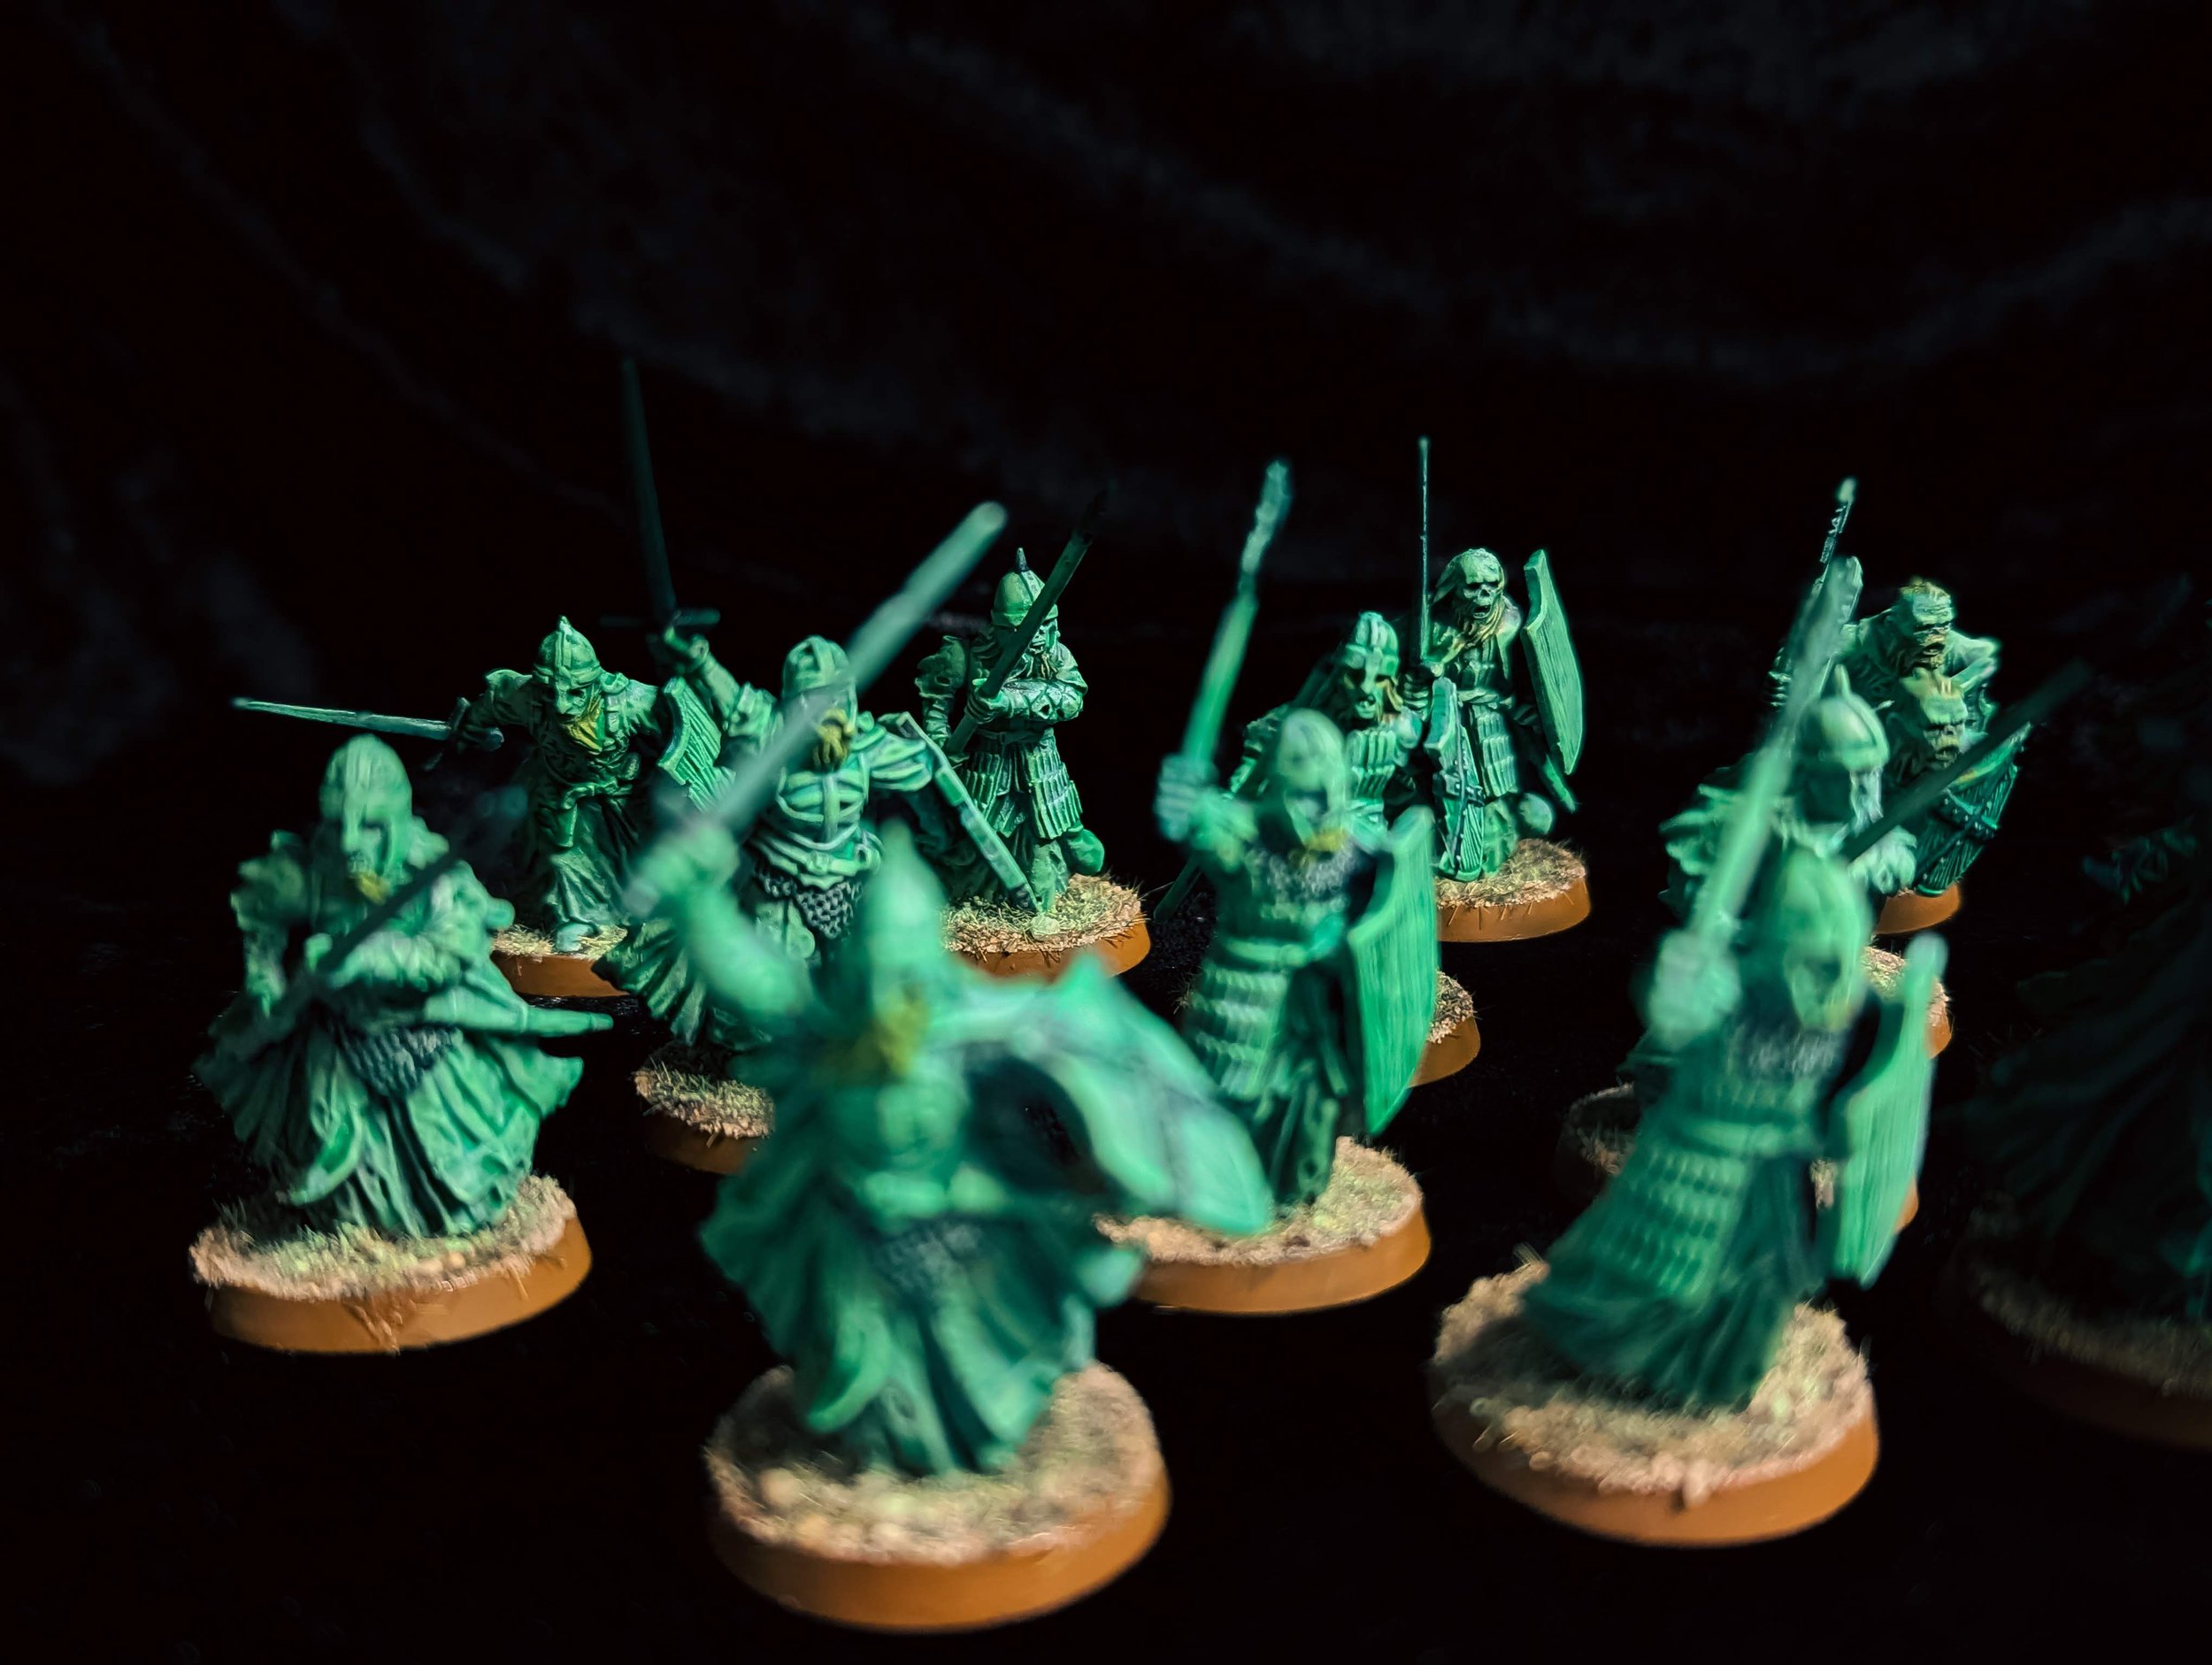
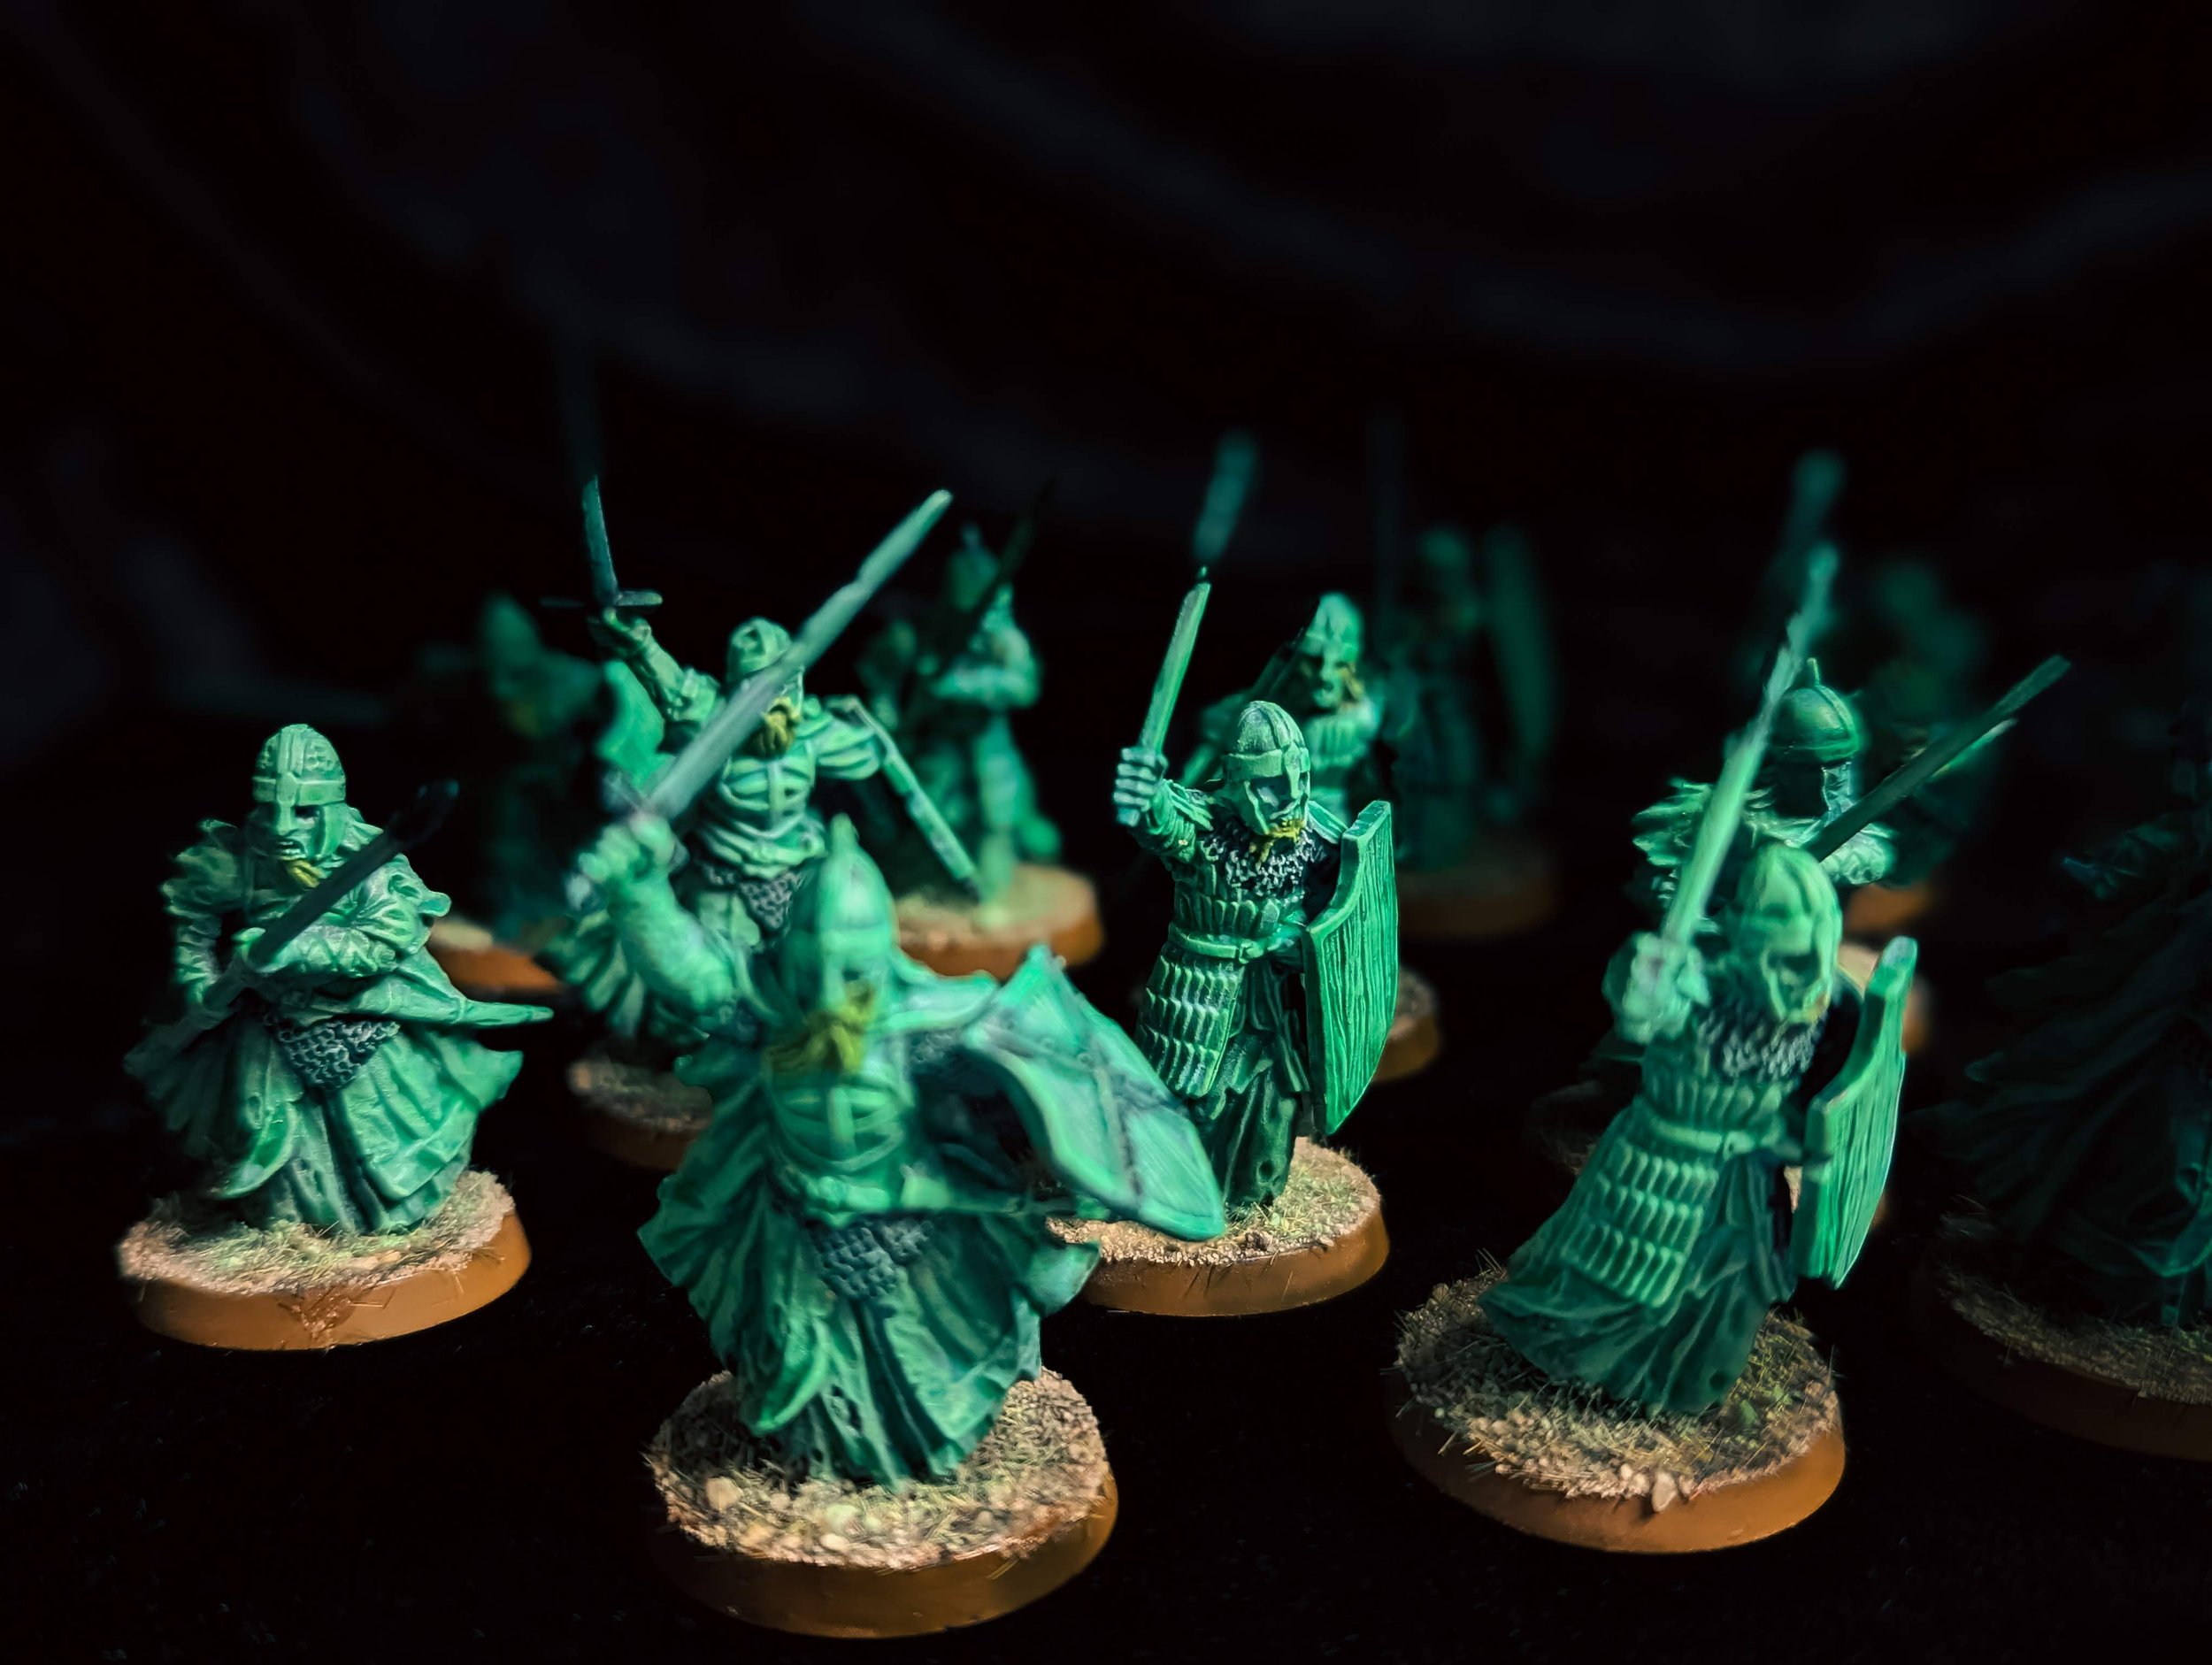
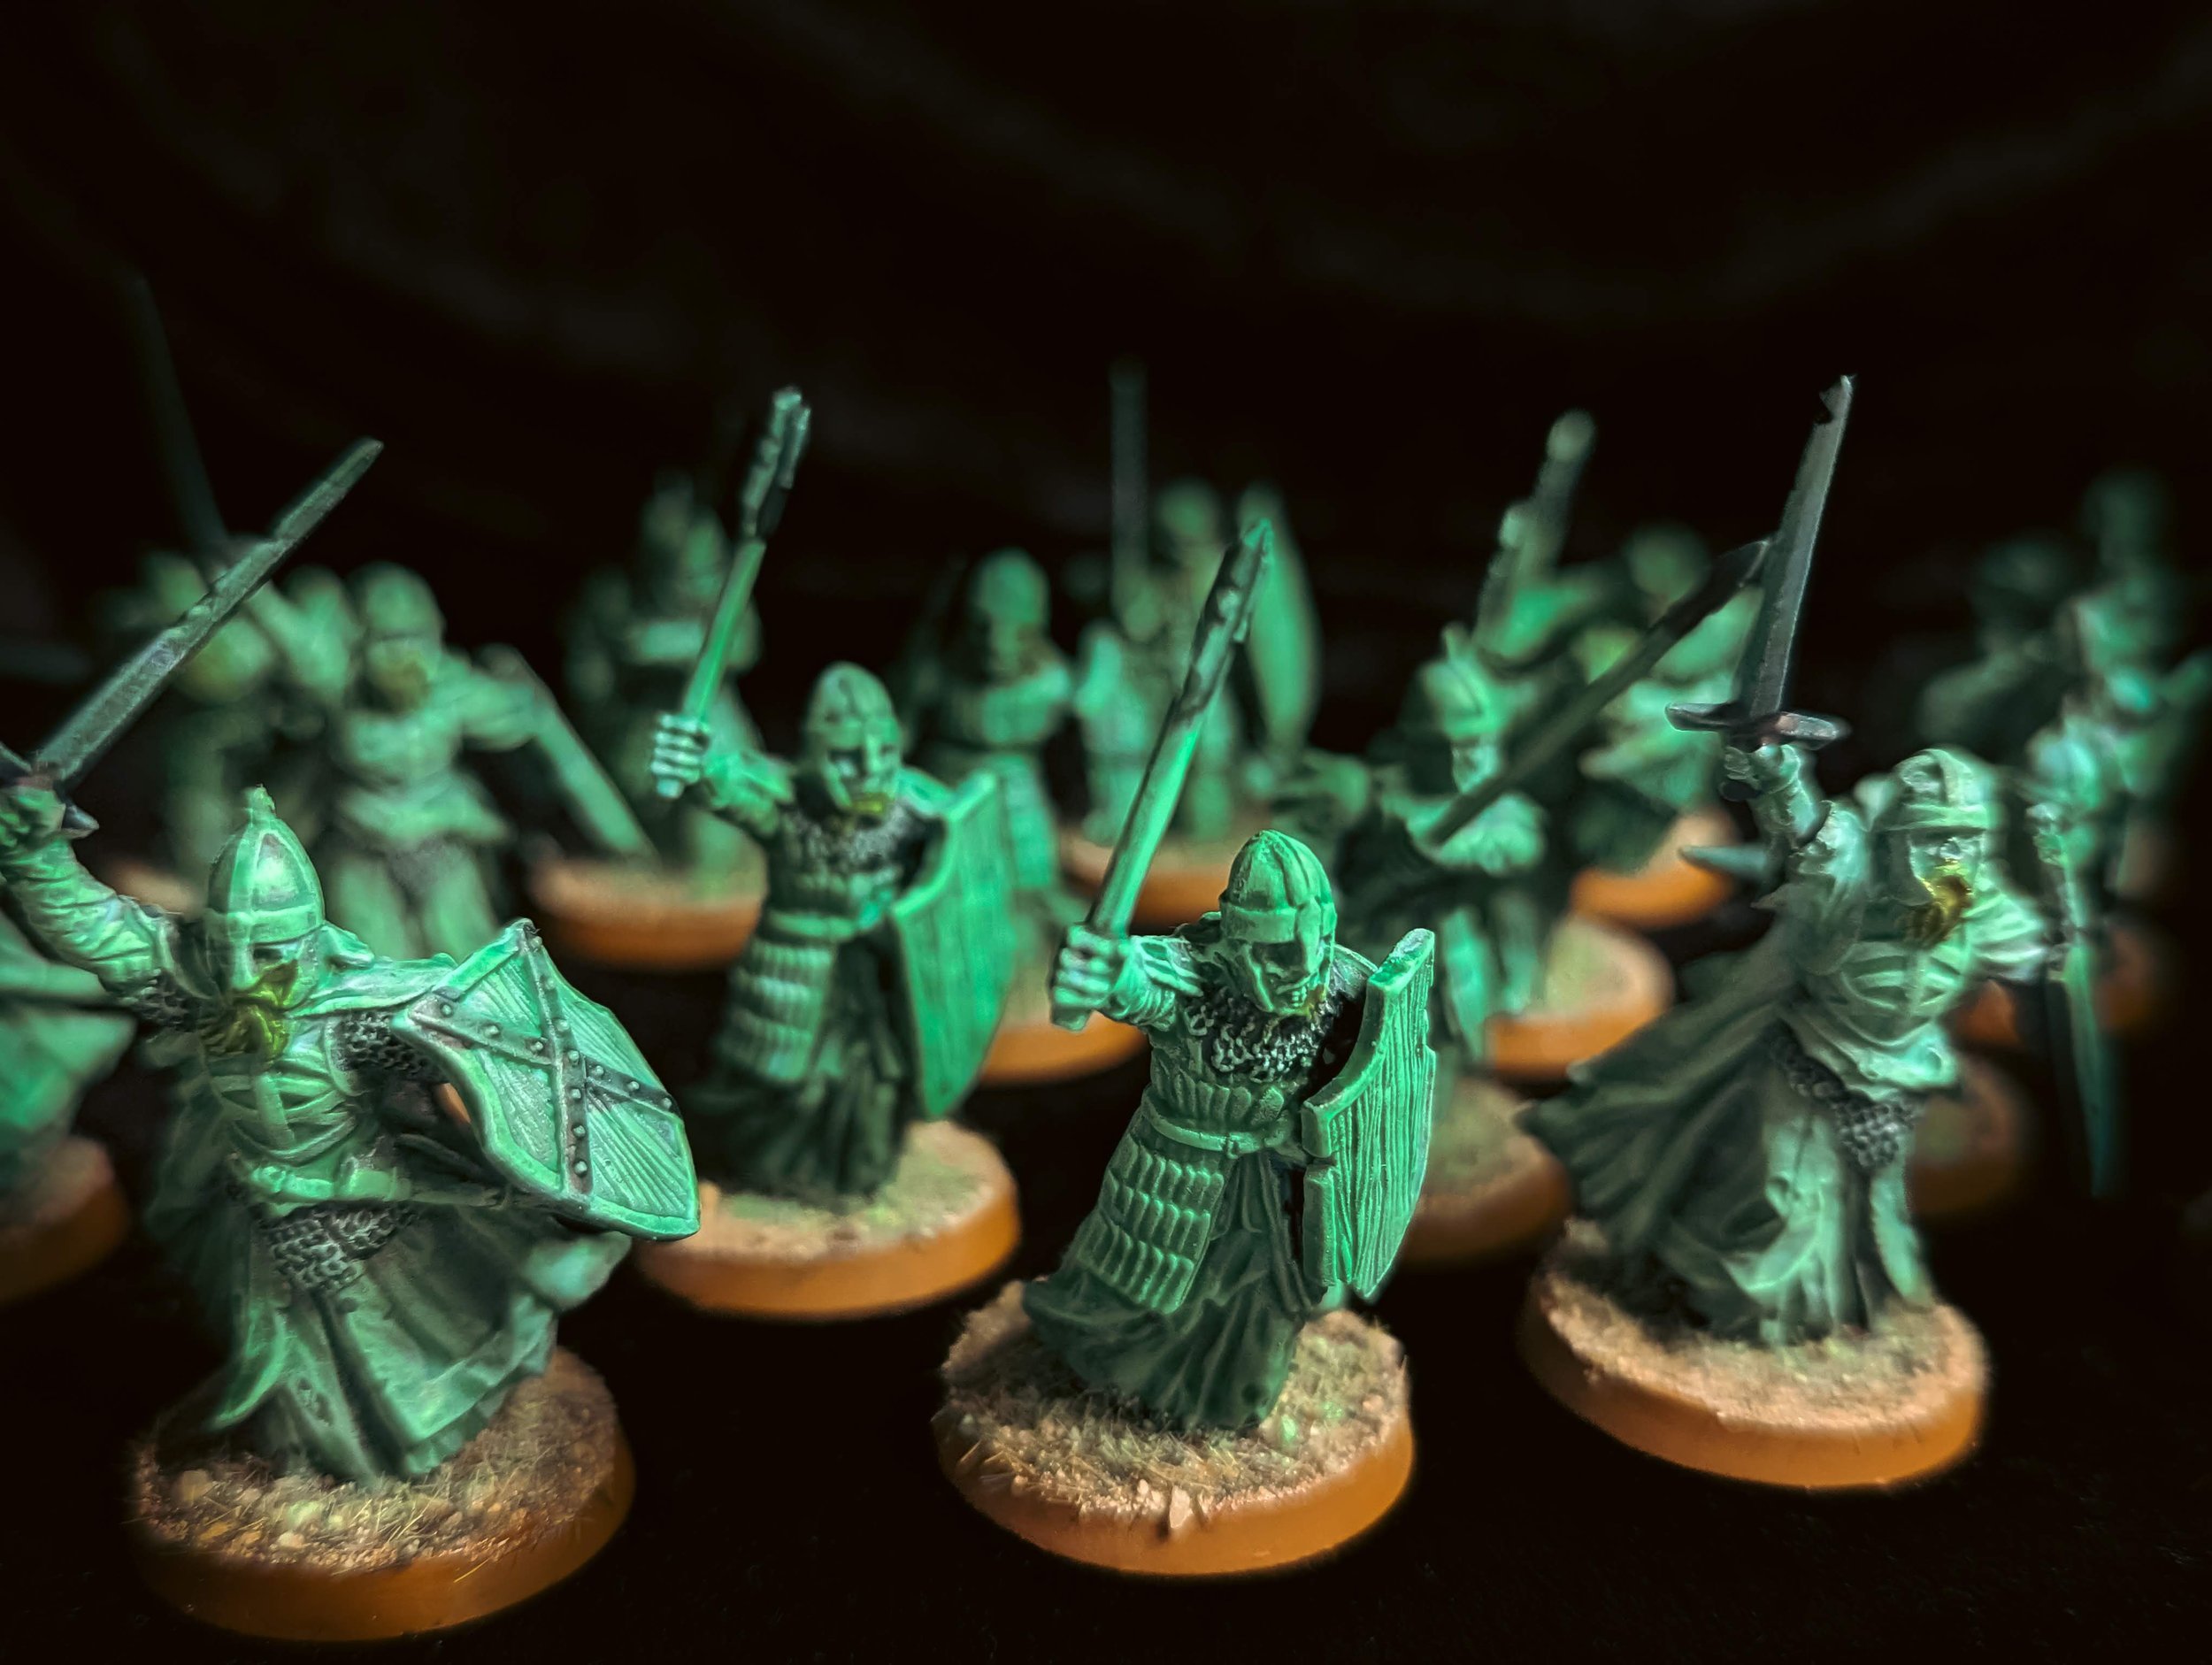
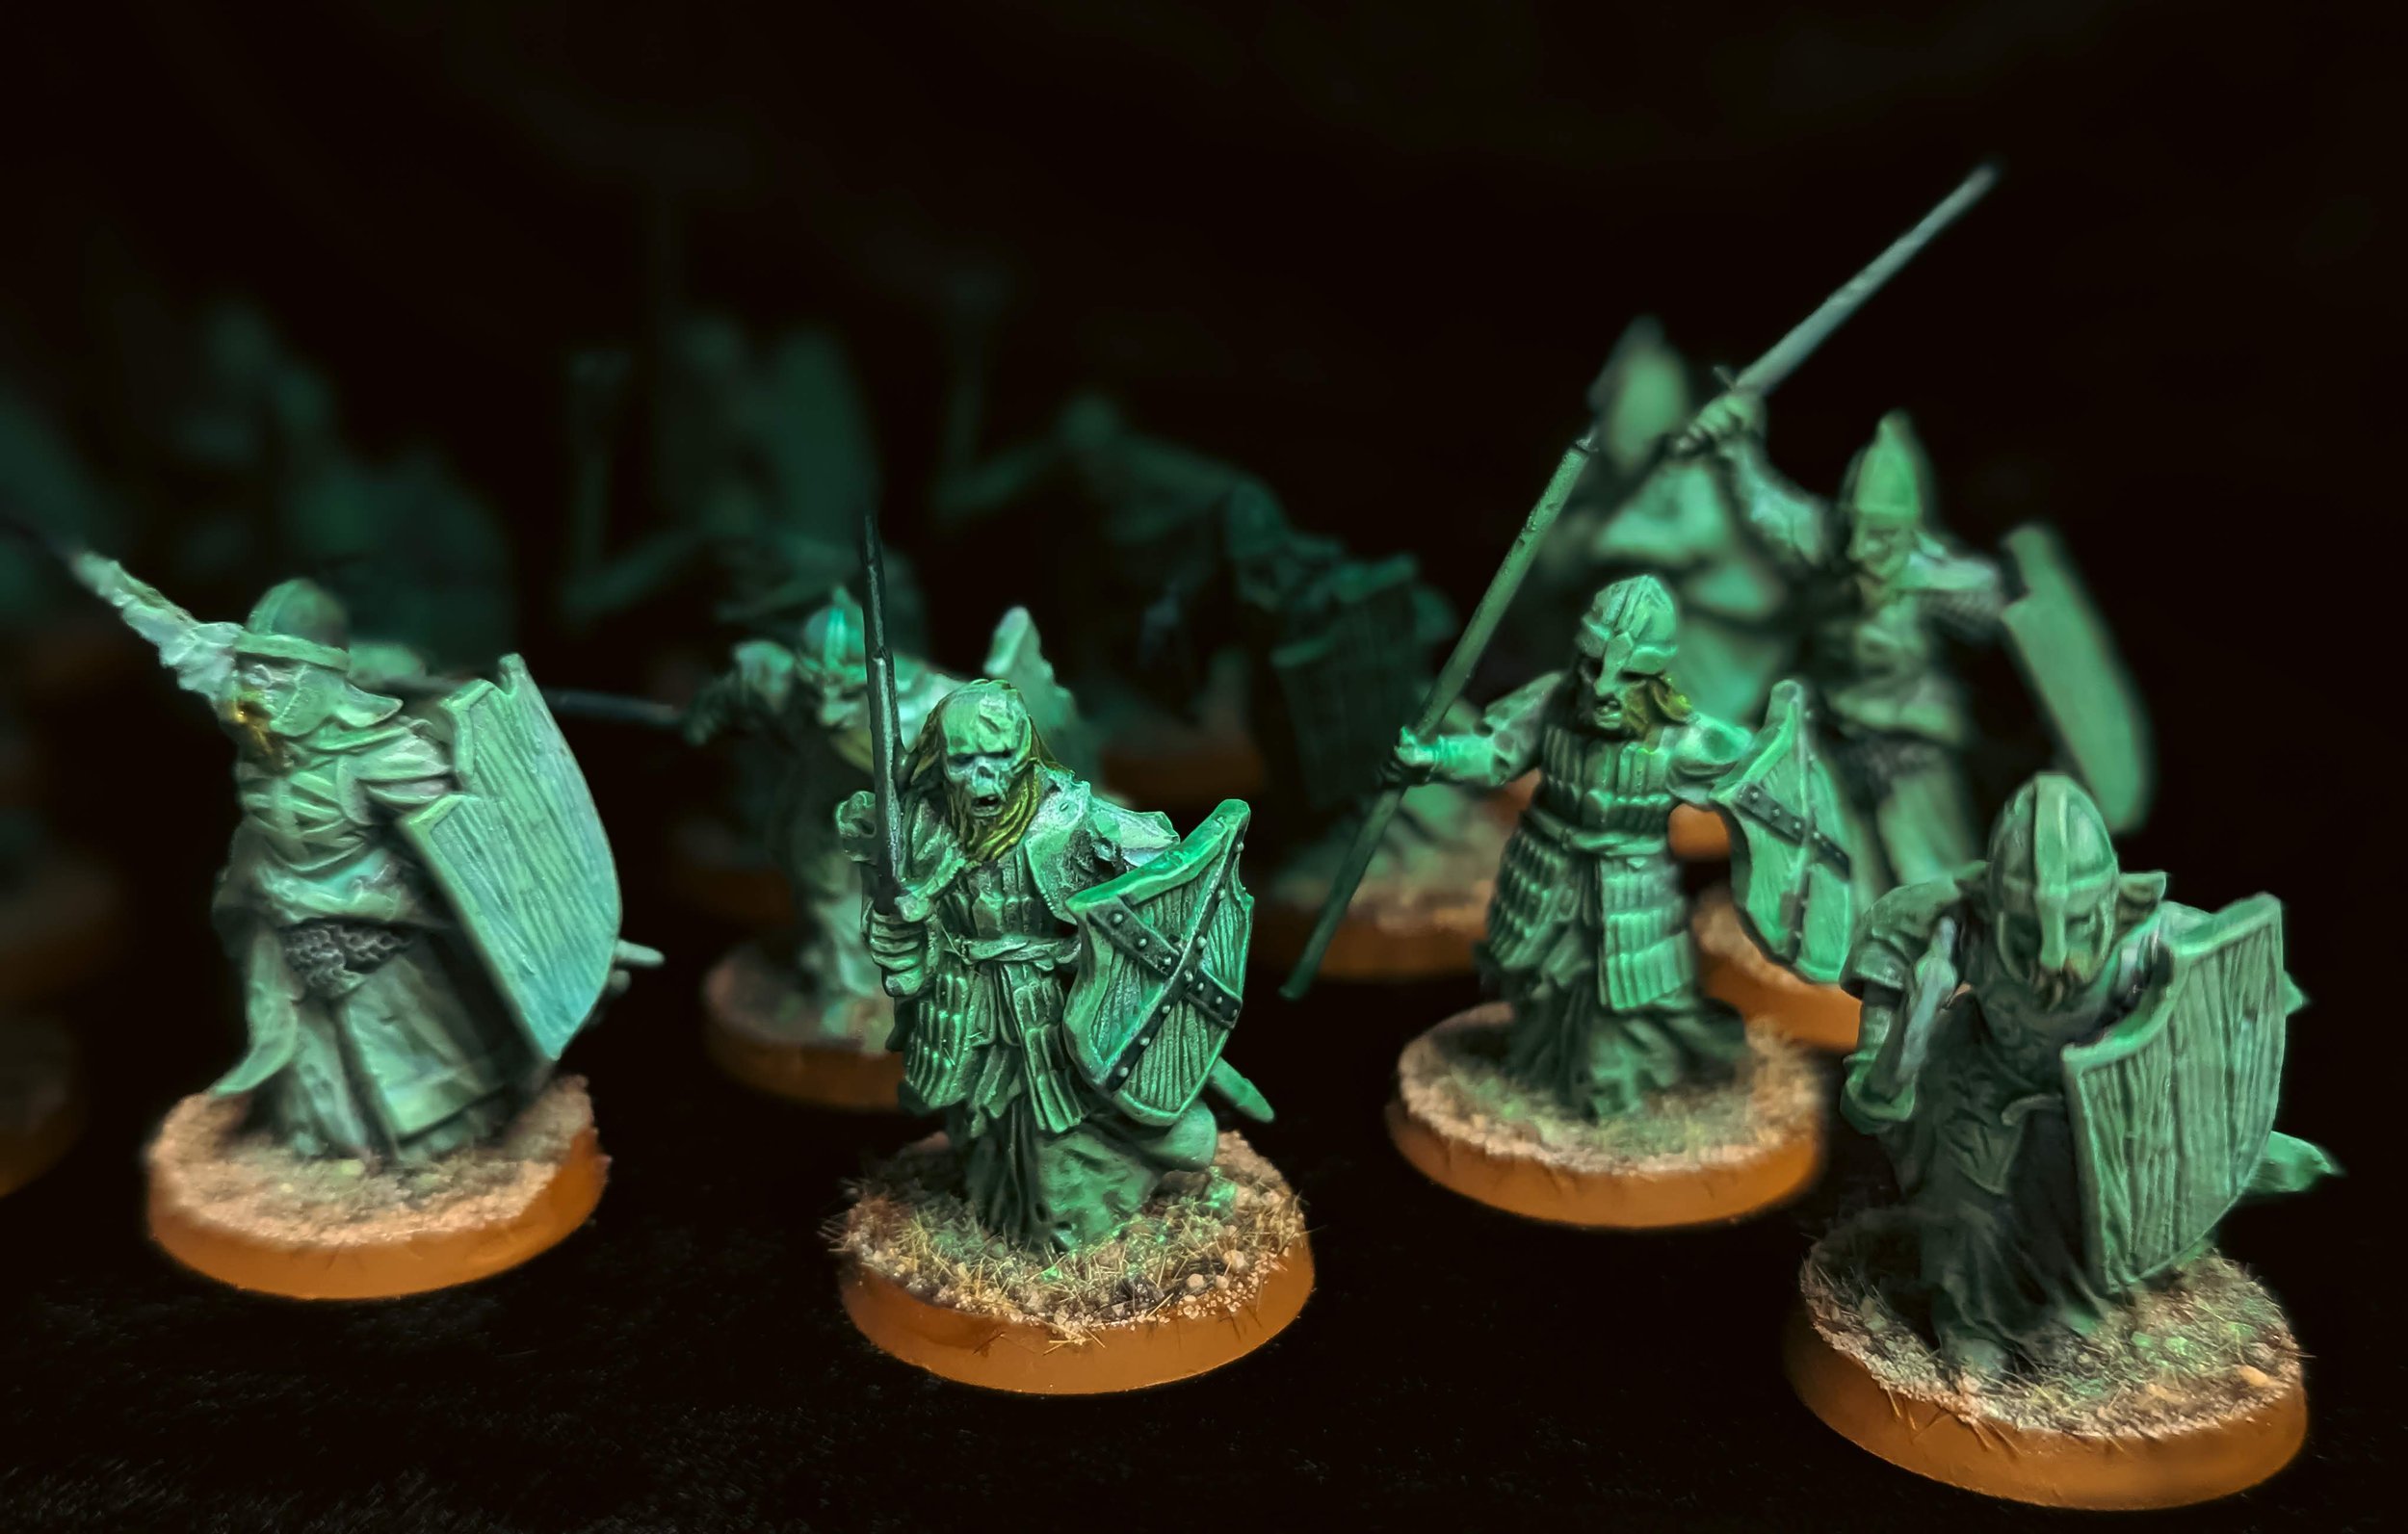
I didn't want these minis to end up too washed out nor too saturated and cartoony. I'm quite happy that I managed to get that sepulchral glow in a way I feel is in keeping with my existing MESBG minis. That being said I feel that the Army of the Dead will always stand out a bit on the tabletop and that's part of the appeal of them. All that is needed now is a quick cinematic photoshoot:

If you enjoyed this make sure to check out my painting Instagram, painting Twitter and painting Mastodon accounts and feel free to use the Element Games Affiliate link below to get discounted minis and send some money my way too!
Tom Out!
